Author: admin

  • How to Freeze Squash? Best Preservation Methods

    Freeze Squash

    Is there a fruit or vegetable you love so much that you’d eat it all the time, no matter if it’s in season or not?

    OR

    Do you have a growing garden of your own which means having the vegetable in abundance but not a big family to finish it within the season?

    You can save it for use later. Yes!

    But how exactly is that possible? By freezing it!

    You can freeze summer vegetables for winter and winter vegetables or fruits for summer! To help you out, we’ll show you how to freeze the top three squashes—two from winter and one from summer. These squashes can be used in countless delicious recipes, keeping most of their nutrition and even tasting better. So, save some time in your routine and freeze these squashes for later use!

    How to Freeze Butternut Squash?

    The process is easy peasy. Follow the steps one by one to freeze your butternut (both raw and cooked).

    Steps to Freeze Raw Butternut Squash:

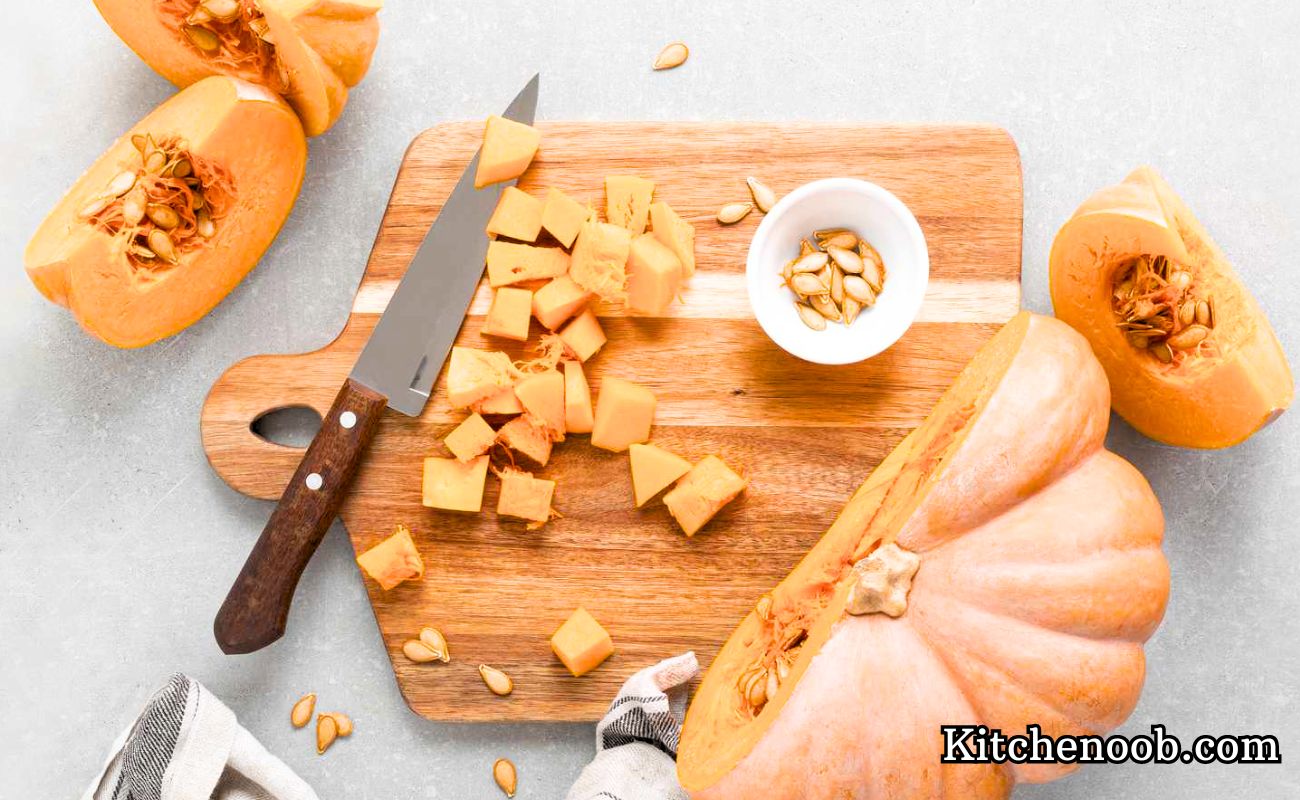
    • The first and foremost thing is to peel the butternut.
    • Later, you’ll need to carefully remove the seeds. Well, don’t damage its shape and appearance while removing the seeds.
    • For storing raw butternut squash, the best approach is to cut it into small pieces and then freeze it.
    • If so, make sure to cut the pieces in equal sizes. f you cut them into uneven sizes, freezing and storing will be harder.
    • Therefore, the size should be about or under 1 inch to use it easily in a variety of meals.
    • Once you’re done cutting, get some parchment paper or a baking sheet, which you can easily find in stores.
    • Spread the freshly cut butternut pieces on the paper on a large tray, leaving a little space between them so they don’t overlap.
    • Now place this tray in the freezer and wait for a few hours to let it freeze to the core.
    • After this, move the frozen butternut pieces into a freezer bag. There are special plastic freezer bags that you can find in the market to store the stuff for a long time without having it deteriorate. Heavy-duty bags or sturdy containers are the best for storing your butternut squash.
    • Don’t fill the freezer bag or container all the way to the top; leave a little space.
    • When you need some, take the bag out, grab the amount of butternut pieces you want, and put the rest back in the freezer.
    • When you need some, take the bag out, grab the amount of butternut pieces you want, and put the rest back in the freezer. You don’t need to reheat it but just letting it adjust with the room temperature is enough.

    Steps to Freeze Cooked Butternut Squash:

    • To freeze cooked butternut squash, you have to undergo the same old procedure of peeling and removing the seeds.
    • Cooked butternut lasts longer in the freezer when it’s blended into a puree.

    • You can pour that purée into an ice cube tray to create fun shapes! It’s a great way to freeze portions for later use or to add a pop of flavor to drinks.
    • However, you can store the cooked butternut puree in a bigger tin than the average size of ice cube trays.
    • Whatever you use to shape them for freezing, don’t forget to place a parchment paper under it.
    • Once it’s frozen, transfer it into a freezer bag.
    • Before using them in the dishes, it is necessary to reheat the frozen cooked butternut puree because it will exhibit no taste otherwise.

    How to Freeze Spaghetti Squash?

    Although you can also freeze uncooked spaghetti squash like butternut squash it is mainly not suitable because it will not make pasta-like strands.

    Steps to Cook the Spaghetti Squash:

    • Begin with cutting the spaghetti squash with the help of extra sharp knives because its exterior is too hard to be cut easily.
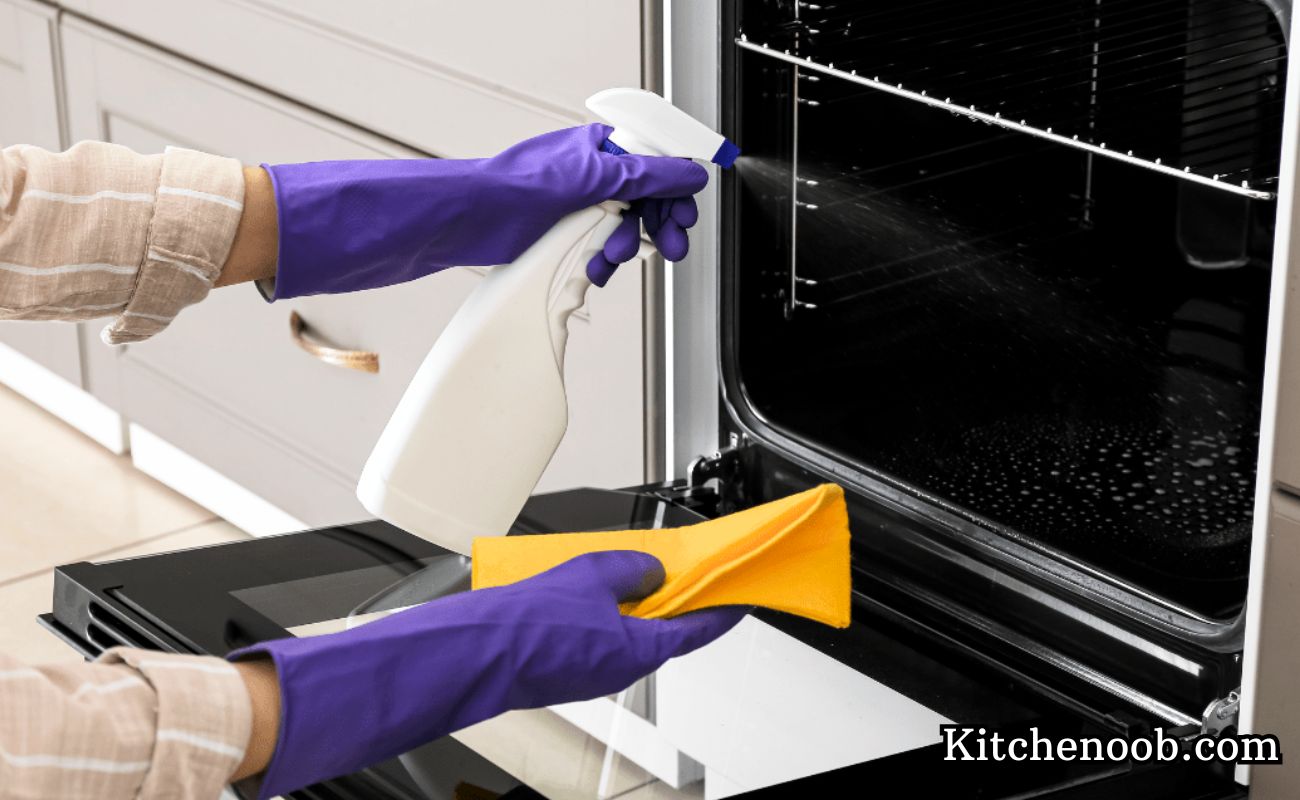
    • To make cutting easier, you can soften the spaghetti squash first. Just place it in the oven for a few minutes before cutting it.
    • Since it is the kind of fruit that is loaded with lots of marrow inside, the wise approach is to puncture it with the help of a fork or knife to create minor holes in it. This will save your spaghetti squash from nearly exploding when the warmth will work on it.
    • This step has to be done if you want to put the spaghetti squash as a whole in the oven. Therefore, if you decide to cut it in half before putting it in the oven, you may skip that puncturing step. But, it is suggested to put this fruit whole in the oven and then cut it.
    • After having the fruit cut lengthwise, remove the seeds. Keep them or discard them, it’s your choice but some people roast them to use as an evening snack.
    • Apply a thin layer of oil, a little salt, and any other herb that you would want to have the taste of. Place it over parchment paper or baking sheet. This seasoning step can also be done later at the time of unfreezing it.
    • Now finally moving it to the oven at 218 degrees for as much as an hour or 45 minutes would do good too if you want a more neutral taste.
    • After that, remove it and allow it to cool to room temperature.

    Steps to Freeze Cooked Spaghetti Squash:

    • To freeze the spaghetti squash, let it cool down first. Let it adjust to the room temperature. It may take half an hour to 1 hour but this is necessary to ensure that the spaghetti strings are completely dry now before you freeze it.
    • After this, place the spaghetti squash on a cookie sheet or parchment paper and transfer it to the freezer.
    • Later on, after a few hours, you can finally move it to another container where it will rest until finished one by one.
    • At the time of eating, take the spaghetti squash out, and warm it in the microwave for a few minutes.
    • If you had seasoned it before freezing, the effort is little.
    • If it was not seasoned beforehand, layer it with olive oil, salt, and pepper and then put it in the microwave for 1 min. Otherwise, just cover the already seasoned spaghetti squash using the oven-friendly cover.
    • After this period, remove the spaghetti squash from the oven and create the strands with the help of a fork. This is ready!

    Are spaghetti squash and butternut squash the same things?

    Both belong to the same family, but they differ in taste, appearance, texture, and how they look when cooked.However, the similar part is, that both are used highly for freezing when the winter season is ending. Butternut squash tastes better when it is frozen in raw form while the spaghetti squash tastes ideal when it is cooked and then frozen. Health-wise, butternut squash offers more nutritional value than spaghetti squash, but many people love spaghetti squash for its pasta-like strands.

    How to Freeze Yellow/Summer Squash?

    Enough about winter squash; let’s explore some summer squash options.

    Steps to Freeze Summer Squash:

    • Buy fresh summer squash from the vegetable store, after closely inspecting that they are not deteriorating even a bit.
    • Wash them thoroughly and gently scrub off any dirt using your hands or a soft brush.
    • Cut them into round slices, aiming for a thickness that’s moderate—between 1 and 2 inches.
    • Now is the time to quickly blanch the cut slices of summer squash.
    • Take a medium water, fill it with water and put it on the stove.
    • Let it come to a boil, then add the summer squash slices. Cook for at least 3 minutes and no more than 5 minutes.
    • As the time to remove them approaches, quickly prepare a bowl of iced water. Fill a bowl with cold water and toss in some ice cubes. This makes a cold bath, perfect for cooling drinks or refreshing food quickly!
    • After removing the summer squash from the boiling water using a drainer, immediately transfer it to the bowl of ice water.
    • After 3 to 4 minutes, discard the iced water, leaving behind only the summer squash slices.
    • Spread these evenly over a paper towel to dry the leftover water.
    • After that, place them in a freezer bag and transfer to the freezer. Use within 6 to 8 months.

     How do you freeze squash without it being mushy?

    To save your squash from being mushy and soggy, you need to swear by these 3 important rules.

    • When you wash it at the beginning of the process, don’t leave it outside for too long. You need to blanch or cook it promptly, depending on the specific fruit or vegetable.
    • Moreover, after you have blanched it and now is the turn to freeze it, make sure to extract all the water out of it. For this, spread it in a tray in the open air.
    • Plus it should also not be warm when you put it in the freezer. Make sure the squash is thoroughly cooled down before filling it into the freezer bag.

    All these things will collectively protect your squash from being mushy and soggy.

    Wrapping Up

    Kids, these days, don’t love some of the fruits at all, while there are some other fruits that they want to eat the year around. Since you can not get the seasoned fruits once their season is out, you can certainly freeze these winter fruits for a few more months to serve your taste buds.

    Spaghetti squash is a fantastic option for kids, offering a low-carb alternative to traditional pasta while still packing in nutrients. Its unique texture can make meals fun, and it’s a great way to sneak in some veggies! Plus, freezing spaghetti squash is a smart way to preserve it for quick snacks or meals later on. Just cook it, scoop out the strands, and freeze—easy and delicious! Do you have a favorite recipe to use it in?

  • How to Season Cast Iron? (Quick and Easy ways)

    Season Cast Iron

    If you are using a cast iron skillet, you know about the benefits of cooking in it. The even heat distribution and cooking throughout the pan, the excellent non-stick capabilities, and the cast iron skillets last for decades.

    Cast iron pans are perfect cookware for frying, simmering, baking, and more. However, they need love and carefulness regularly. The delicious cooking experience that you get with a cast iron skillet certainly balances this routine care and maintenance.

    If you are not sure how to care after your cast iron skillet as well as how to season the pan and what to do if your cast iron skillet is rusty, this ultimate guide will walk you through all these routine maintenance tasks of cast iron skillets.

    3. Simple Ways to Season Cast Iron

    Below please find the most common ways to season cast iron quickly and effectively.

    Seasoning Cast Iron in Oven

    We call this seasoning method the standard one. For many decades, oven seasoning has been the most recommended method to season new and old cast-iron items. And you will not find any other method simpler than the oven seasoning. Here is how you do that:

    • Apply a thin layer of oil on a cast iron skillet and put it upside down in an oven.
    • Preheat the oven before keeping the skillet.
    • The ideal oven temperature for seasoning is 450 to 500 degrees.
    • Let it in the oven for about 60 minutes to 90 minutes.
    • Now, turn off the oven and let it cool down. This helps the seasoning set properly on your cast iron.

    Pros

    • The method is simple, and you can do it without any hassles. However, ensure that the oven is pre-heated correctly before placing the skillet in the oven.

    Cons

    • As compared to other seasoning ways, oven seasoning takes about 3 to 4 hours. So, in this way, it is time-consuming.

    Cast Iron Stovetop Seasoning

    Stovetop seasoning is the most preferred method of seasoning for experts and professional chefs. The stovetop seasoning is relatively simple and the most effective seasoning way for cast iron utensils and cookware. Here is how you do that:

    • Apply a thin coating of oil, preferably vegetable oil all over a cast iron pan.
    • Don’t forget to apply the oil on the backside of the pan.
    • Now place it on a stove till you notice a lot of smoke.
    • Keep it for at least 20 to 25 minutes on the stove.
    • There will be a lot of smoke, so be cautious.
    • Now, remove it and let it cool down entirely before usage.

    Pros

    • Stovetop seasoning is quick. You can do that in about 30 minutes from start to finish. Another main benefit of this method is that you will not be using your oven for hours.

    Cons

    • There will be a lot of smoke. So, if you are suffering from any respiratory problem, stovetop seasoning is not recommended for you.

    No Seasoning

    Some might be surprised to learn that many experts prefer not to use seasoning at all. They believe that adding too much can hide the natural flavors of the food. What do you think about that idea?

    One such expert is Dennis Powell of Butter Pat Industries. According to these class of experts rather than seasoning specifically by using any method you just “grease the pan with lard and cook.” That’s all.

    Another thing that experts recommend when you follow the seasoning method is to always cook high-fat content first in your cast iron skillet. As per experts, if you frequently cook high-fat content, you don’t need any seasoning.

    Pros

    • Factually there will be no work of any kind for you to do. No oven usage, no smoke, no oil.

    Cons

    • You might find the uneven surface and dark spots on your cast iron cookware.

    Go to top

    How to Reseason Cast Iron

    If you were not taking care of your cast iron skillet for quite some time, you might need to reseason it before using it or else you will find it difficult to cook in it.

    How and When to Re-Season Cast Iron

    With time, the skillet’s finishing may gradually wear off. Mainly it depends on your usage and how you clean or maintain it after the usage.

    If you are going through this problem, then it is time to re-season your cast iron cookware. Follow these simple steps to reseason the cast iron skillet:

    Clean it Properly

    The first step includes washing your skillet thoroughly with warm, soapy water. You can also use salt and a paper towel to remove the stubborn bits and residues.

    After cleaning your cast iron pan, make sure that it is wiped and dried completely.

    It is essential because little moisture in your pan can attract rust. For this purpose, you can heat the pan on the stove so that no moisture is left in the pan.

    Apply Oil on Your Cast Iron Pan

    After washing and drying, move on to apply a thin layer of oil on your skillet. Apply the oil on the cooking area, pan sides, and at the bottom. In simple words, ensure that the whole surface is covered with a layer of oil including the nooks and crannies of the skillet.

    The layer will protect your pan from rust. However, don’t use too much oil, and if you notice that oil is in excess, you can wipe it off with a paper towel.

    Which Oil is Best to Reseason a Cast Iron?

    You can use vegetable oil, bacon grease, or lard to reseason your cast iron pan. In our opinion, you can use any cooking oil; however, flaxseed oil is mostly preferred by users to reseason a cast iron skillet. If you don’t have flaxseed oil, you can use any other cooking oil.

    Reseason the Cast Iron Skillet in an Oven

    You can also reseason cast iron in an oven, and it is simple.

    • First, put the aluminum foil to protect the rack of your oven. (Always apply a thin coating of oil when seasoning or re-seasoning the cast iron skillet). Now, preheat the oven to 450F.
    • Now, put the cast iron pan upside down in the oven.
    • Leave it for about 35 minutes to 60 minutes and after that, take out your skillet. Apply the oil again and put it back in the oven. Repeat it for 2 to 3 times. (Your pan will be too hot, so be careful while doing this).
    • After the last round, take out the skillet and let it cool. It will take approx. 1 to 2 hours. After your cast iron pan is cooled, you can use it for cooking.

    Reviving and Seasoning a Rusty Cast Iron Skillet

    Things that you will need

    • Steel wool
    • Soap
    • Scrubbing brush
    • Paper towels
    • Vegetable oil or any other cooking oil
    • Foil

    Ways to season a rusty cast iron frying pan

    Take away all the rust: You can use steel wool to remove all the rust from your pan. Scrub it till all the rust is removed.

    Wash the pan properly: After removing rust, wash the pan with plain water and soap. Scrub the pan gently with a bristle brush or sponge.

    Dry the cast iron skillet: Wipe it and dry the pan with paper towels.

    Apply oil on the pan: Apply a little vegetable oil or any other cooking oil on the entire skillet. If the handle is rusty, apply oil on the handle as well.

    Put the skillet in an oven: Now, put the pan overturned in the oven. If there is any excess oil, wipe it off with paper and place aluminum foil to prevent the oven from oil dripping. Heat the cast iron at 350 degrees for up to an hour.

    Let it cool down completely before using.

    Best way to Season Cast Iron

    To enhance the working life and efficiency of your cast iron cookware, you need to season it properly before usage and the best way to season the cast iron is mentioned below:

    • First, heat your oven to 350 degrees F. Wash and clean your cast iron cookware with hot soapy water.
    • Now, dry it completely with a paper towel.
    • Now, apply a thin layer of oil all over the pan and handles.
    • If there is any excess oil, remove it by using a paper towel.
    • Put aluminum foil on the bottom rack of the oven and put the skillet on the head in your oven after it is pre-heated.
    • After an hour switch off the oven and let it cool down in the oven. Never use ice or water to cool it down.
    • For the desired results, you can repeat steps No. 4 and 8 two or even three times.

    How often do you Season a Cast Iron Skillet?

    Nowadays, cast iron skillets come pre-seasoned, but you should season it before the first use. After the first use, if you are adequately maintaining your skillet, you don’t have to season or reseason it until it loses its effectiveness. However, if you still want to give your cast iron skillet special care, once or twice a year is enough.

    How to Cure a Cast Iron Skillet?

    The best way to cure a cast iron skillet is to maintain it properly and season it when required. Always season your skillet before the first use even if it comes pre-seasoned. Similarly, never leave any wetness or moisture in the pan after cleaning, wipe it with a paper towel or put it on the stove. Cast iron skillets can attract rust rapidly, so be careful.

    How to Care for Cast Iron?

    To maintain your cast iron cookware always follow these simple routine tasks:

    Wash it with Soap Once

    It’s OK to use soapy water on a new cast iron pan or a rusty one but avoid hard detergents or soaps as it will affect the non-stick surface of the pan. Similarly, don’t wash cast iron pan in a dishwasher.

    Season Your Pan Before First Use

    Seasoning your pan creates a non-stick coating, and the surface of your pan will get much better with the usage. Mostly, cast iron pans come pre-seasoned, but you should season them as well before the first usage.

    When Cooking for the First Time

    Cast iron cookware is ideal for many food items such as searing pork chops to baking cornbread. Here we will recommend you to prepare a high-fat content because it will harden the non-stick surface. Similarly, never store any type of food in a cast iron skillet as it can affect the seasoned surface.

    Keep Your Skillet Clean

    Never soak your cast iron cookware. You can use a Luke warm water and a soft sponge to remove cooking residue. Never use harsh chemicals or steel brushes to wash your pan.

    Dry it Completely

    Moisture is not good for cast iron pans because it will attract rust. So, dry the pan completely after washing. You can place the pan on the stove for 5 minutes so that there is no moisture remaining in the pan. Similarly, always store cast iron cookware in a dry place to prevent rust and corrosion.

    Wrapping up 

    You can cook various delicious items in a cast iron skillet including that classic rustic seasoned taste that you will only find in a cast iron skillet.

    As long as you are seasoning the cast iron skillet correctly or taking adequate care of it, the cast iron skillet will work effectively for a lifetime. In this guide, you will find all the information regarding the maintenance of cast iron skillet and how to season a cast iron skillet. Overall, cast iron cookware is simple to use and clean. So, you will not have much hassle in taking good care of it.


  • How to Clean Oven Rack in 5 ways? (Quickly and Easily)

    How to Clean Oven Racks

    Baking and cooking are hobbies that many people love. They let you be creative, try new flavors, and share tasty dishes with friends and family. Whenever someone, especially a new chef, grabs a skillet, our kitchen, sometimes, becomes a complete mess. When you bake, oven racks can get messy, and cleaning them afterward can take a lot of time and effort.

    Perhaps, nothing can be worse than a dirty oven. It is among the terrible tasks during the cleaning process. The situation gets dreadful if oven racks are coated with stains, burned foods, and grease. The racks of the oven still catch some residue or grime if you don’t use them.

    So, they require timely cleaning because if you don’t, your efforts and time in cleaning them will be much more, and it won’t be easy to bring them back to their original glossy condition.

    So, how do you clean your oven racks? It is simple! Our experts have got you covered. Below you will find a thorough guide regarding the cleaning process. So, let’s move on:

    What are Oven Racks?

    What are Oven Racks?

    Oven racks are partitions in the oven, which you can remove for various purposes, such as cleaning, and you can also move them as per the temperature requirements of your cooking/food.

    The middle rack of the oven provides an even distribution of the heat and air that helps in perfect baking.

    The bottom oven rack is closest to the heat source, making it ideal for foods that need high heat, like pizzas or roasted vegetables. It helps achieve a nice, crispy bottom. The top oven rack is the farthest from the heat source and is ideal for delicate baking/cooking items.

    Best Ways to Clean Oven Racks

    Best ways to Clean Oven Racks

    When you bake or cook in your oven, the oven racks are the first component that catches grease and grime. Here is the best way to clean your oven racks, and after using this cleaning technique, your racks will look brand new.

    So, stay tuned and follow these simple steps to make your dirty oven racks like brand-new ones, and we are sure that by the end of this post, you will get shiny and sparkling oven racks.

    • First, place a clean towel at the bottom of the bathtub so that the surface of your bathtub can be protected from abrasions and marks caused by detergents and racks.
    • Now, place the oven racks on top of a towel in the tub. This will help catch any dirt or grime that comes off while soaking.
    • Then fill the bathtub with hot water and plug the drain. Hot water will break all the stains and grease on the racks.
    • Let it fill until all racks are dipped in the water fully.
    • Now, take a cup of any washing detergent in a jar and fill it with plain water.
    • Then add this mixture in a bathtub. The soapy water and the detergent will work together to remove grease and stains from oven racks.
    • Now let them in the water for up to 6 to 10 hours, or if your racks are too greasy, leave them overnight.
    • After 6 to 10 hours or the next morning, drain the bathtub and take out the racks. You will find the clean oven racks this time.
    • Dry them thoroughly before placing them back in an oven. And here is the best way to clean your oven racks!

    How to Clean Oven Racks with Dryer Sheets

    How to Clean Oven Racks with Dryer Sheets

    Here is another popular and straightforward method to clean the racks. Many people like to clean the oven racks with the help of dryer sheets. Here is how you do it:

    • Take five to ten dryer sheets and them in a bathtub.
    • Now take about half a cup of dishwashing detergent and put your dirty oven racks in it.
    • Let them soak for five to ten hours (it depends on the conditions of your racks)
    • The fabric softening extracts in dryer sheets will soften the food residue-caked grime from racks.
    • However, there are some vital points to keep in mind while using this cleaning method:
    • Dryer sheets contain ingredients that can be dangerous to your health. Second, dryer sheets are expensive, and no manufacturer recommends this method.

    How to Clean Oven Racks with Ammonia

    If your oven racks are extremely dirty and greasy, then you should go for this method. This ammonia and rubbish bag cleaning method will remove all the caked grime from the surface of your oven racks

    Wear household gloves and place the racks in a rubbish bag. Now, pour about a half cup of ammonia on the racks. Close the bags as tightly as you can and remove as much air as possible. Then, leave the bags in a separate place, preferably outside your kitchen, for up to three hours.

    Now, wear the gloves again and take out the racks from the containers. Wash and clean them thoroughly with water and dry them before putting them back in an oven.

    How to Clean Oven Racks with Foil

    How to Clean Oven Racks with Foil

    Cleaning an oven rack with foil is a simple and one of the most effective methods. To do this, you will need a dishwasher tablet, a bathtub with water, and aluminum foil. The process is not too time-consuming, and you can complete it in about two hours. Follow these steps to clean your oven racks with foil:

    • Take out oven racks and wrap them with aluminum foil.
    • Now put them in a bathtub filled with hot water.
    • Let them soak in hot water and a dishwasher tablet for two hours.
    • After that, take the racks out of the water and unwrap them.
    • Dry the racks and put clean oven racks back in your oven.

    Why You Should Clean Your Oven Racks

    Cleaning oven racks is not an exciting task. It can be lengthy, and most of us don’t like scrubbing the racks. But it is essential to clean them frequently, and we all must do it for better health.

    Every so often, after you cook or bake any food in the oven, burnt food, grease, and residue are left on the racks. It looks filthier, and more importantly, if you don’t clean it, you will be cooking in an unhealthy environment.

    With these techniques, your racks will be cleaned and shining like a new rack. All the methods mentioned in this reading require minimum effort at your end. Lastly, cleaning oven racks is a task that we don’t like, but it is essential for the better health of you and your family.

    What is the Easiest way to Clean Oven Racks?

    What is the Easiest way to Clean Oven Racks

    Luckily, by using this method, you can perform the task in no time and with less hassle. So, allow us to present the easiest way to clean oven racks:

    For this method, you will need a bathtub, dishwasher granules, old but clean towels, and sponges.

    • In this easiest method, place the old and clean towels in your bathtub. You can also place sponges in the corners to protect the surface of your bathtub.
    • Now, carefully put the racks above the towels and sponges.
    • Fill the bathtub with normal water and pour a cup of dishwasher powder.
    • Keep the racks in the water for a whole night.
    • Take out the racks from the tub the next morning and wash them with plain water and sponge. If you still see any stains or caked grime on the racks, scrub it with a sponge.
    • Dry the racks properly before using them.

    Some Additional Tips to Remember:

    If you want to use this method, there are some vital things to keep in mind:

    If your oven racks have an enamel finish, don’t apply too much force or pressure. Similarly, don’t scrub them too hard as it can damage the finishing. Use an old toothbrush or soft bristle brush to clean the racks.

    You might like: How to Clean Cast Iron Skillet

    Cleaning Oven Racks – FAQ’s

    How to Clean Oven Racks with Baking Soda

    How to Clean Oven Racks with Baking Soda

    Baking soda is an excellent oven rack cleaner. It’s affordable, won’t scratch the rack’s surface, and has excellent cleaning power.

    Here’s how to clean oven racks by using baking soda:

    • Fill the tub with hot water.
    • Now, pour three cups of baking soda and mix it properly.
    • Then, put the racks in water in such a way that they are fully covered in the water.
    • Let the racks soak in the baking soda solution for about six to eight hours.
    • After that, take the racks out and wipe them with a clean rag or sponge.
    • Rinse and dry the racks before using the oven.

    How to Clean Oven Racks in the Bathtub

    How to Clean Oven Racks in the Bathtub

    If you are wondering how to clean the oven racks in a bathtub, well it’s simple:

    First, fill the bathtub with hot boiling water and pour three cups of dishwashing soap or laundry detergent. Let the racks in the water overnight. You can also sprinkle the baking soda on the racks along with dishwashing soap and detergent.

    Next morning, brush the oven racks with a clean towel to remove dirt and grease. To remove the baked grime, you can use an old toothbrush. Then, rinse and dry the racks before placing them in the oven.

    How to Clean Oven Racks with Vinegar

    How to Clean Oven Racks with Vinegar

    Using vinegar and soda is one of the best ways to clean oven racks, and it is one of the simplest as well.Here’s how to do this method:

    Pour baking soda on the racks, then soak them in vinegar. You can use a large sink or bathtub for this purpose. The strong chemical reaction between these two ingredients will form bubbles and foam in the water, and when the reaction is over, you can put the oven racks in the water. Let them soak overnight. The next morning, scrub the oven racks with a dishcloth or old toothbrush.

    Wrapping Up 

    In this guide, I have told you about the best ways “How to Clean Oven Racks?”.From my perspective, the easiest and most reliable way to clean the racks is to put them in the bathtub, let them soak overnight, and then just scrub them clean the next day.

  • How to Clean An Electric Skillet ?(Easy and Simple Guide)

    Clean An Electric Skillet

    As fast as we are growing, we are increasingly indulging in technology, and no doubt, it is happening fast.

    In miscellaneous fields and the kitchen now, the gas-compatible pots and pans have been replaced by glassinduction, and electric skillets. Electricity is handy at any time, and people prefer electric skillets for many reasons, which you can read about at the end of the article.

    I was inspired by one of the reasons and I bought it with no clear closure but I can confirm, that I did not regret it a single day.

    It took me some days to measure its right method of usage that I am too eager to share with you people because I believe, and respect the fact that you get to have food but don’t forget the sources that bring you your favorite meals.

    Taking my cooking stress off and providing me with the yummiest of recipes, I can go an extra mile for its care or maintenance, you should too.
    Let’s have a mutual look, once again, at the tips drawn by me, thanks to my observation.

    Cleaning an Electric Skillet; The General Tips and Guidelines

    To keep utilizing your electric skillet to save your time and otherwise efforts, you must abide by the following common steps to ensure the skillet’s life for good.

    1- Let it Cool Down Completely

    So most of our busyheads want to take the chores off their heads by rinsing the cookware right after cooking which is, of course, an utterly disappointing practice. Remember only you are in a hurry, not the skillet. It will take its time to get into the shape to be washed as hot skillets are a little sensitive to the water mixed with detergent and then you scrub, it may get offended, who knows.

    2- Separate the Power Control

    After the job is done, remove the skillet plug from the connector and boom. Wait for some time until the skillet temperature adjusts to the room temperature. Clean the connector with just a clean cloth or a slightly wet wipe.

    3- Save the Connector

    Now the important step arrives, you have to be attentive to the entire process here. While you need to wash up the skillet precisely, the connector part also has to be saved. You can ask someone to assist you by holding the control system while you rub the skillet, just to keep the water out of reach.

    In case you are alone on your own, try wrapping the plastic sheet around the connector and then wash the skillet.

    4- Wash it Up

    Prepare slightly hot water mixed with dish soap in the sink. Put the skillet in it and let it be there so that the warm water absorbs in the residues and weakens the stickiness of the leftovers to be removed easily. Rub with a soft nylon sponge or stainless steel wired rubber to separate the residues from the surface of the skillet. Rinse well.

    5- Dry Dearly

    The significance is not just for washing but for drying also. Regular cleaning of the skillet with a dry cloth before stacking it in the cabinet can also help in retaining the efficiency that the surface holds, more in particular if it’s nonstick.

    Some Do and Don’ts:

    • For sure you are bound to avoid the use of the dishwasher due to the connector but the lid is free to be washed in the lid. You can put the lid in the dishwasher while you hand wash the skillet.
    • Engaging the plastic and silicone spatulas in the cooking will be useful for the long term because no matter if it’s heat the heat provided by electricity is of a different kind and can react even differently.
    • For mild off-and-on cleaning, try the in-pan boiling method by simply filling the pan with water and then letting it boil. The residues will be removed effortlessly and you can just add a bit of soap and rub altogether later.
    • Apply a paste of baking soda mixed with vinegar for about 15 to 20 minutes to rid your skillet of unnecessary stains prevailing on the surface gradually.
    • Be conscious of not letting the connector have contact with water. Just don’t.
    • If you want to try some store-bought cleaning agents, avoid the ones that have chlorine or ammonia in it. I personally like Barkeeper’s Friend as it is mild yet powerful enough to be effective in the very initial use.

    What are Some Serious Benefits of Having an Electric Skillet?

    There are many, honestly, for when I bought mine, there was not just one pro that stirred me to buy it immediately.

    First of all, it helps to be an additional burner in your kitchen in case a lot of guests give you a surprise visit and you get to cook a variety of dishes at one time.

    Or maybe one day you feel like cooking in your lounge or room instead of the kitchen, you know some quick and light cooking on bad health days, emotional or physical, we have them both. Right?

    Secondly, if your cookware does not support oven use, you can ideally employ this skillet on the job. After this, you would not need any special oven or broiler cookware to kill the necessity. Some people I know, on purpose, use an Electric skillet in place of the oven-safe pans and pots.

    The most important benefit is in traveling, you know if you are staying in a hotel, you can cook your favorite meal anytime.

    Though these are just the starter gains, you can explore even more once you start using it and I am not even kidding.

    Wrapping Up

    When you purchase the electric skillet, if you yet have to buy it, look for a glass lid as the glass lids are not only in vogue but also prove to be efficient in dealing with the heat, ultimately helping you with the handling. The current users can save this tip for the next time.

  • Titanium Cookware Reviews (5 Best Choices ) – Buy For Today

    If you are a cook, deliberately or forced, professional or homemade, you might have come across a mass of various cookware materials that the total count must have been missed.

    Though exaggeration apart from aluminum, ceramic, non-stick, stainless steel to cast iron, the kitchenware has a lot more to offer. But there is one more, that’s our favorite and a sheer gift for you if you have not tried it before, ’s Titanium cookware. It deserves a special place in your overloaded kitchen cabinets and you will let these happily after you learn the benefits.

    As experienced, good cookware can put your cooking skills plus health serenity to the next level, better one and you can’t help but stick to it for the next maximum years. If you fear switching options, you are requested to change this behavior, at least for this one, and let the results surprise you, positively for sure.

    Titanium is by nature so durable that once bought, your grandchildren can also taste the food cooked in this cookware. On a note, you can’t find a holy pure titanium pan or pot, it will always be a mix and match of titanium with some other material.

    Stay calm while searching for your future culinary partner down there.

    Why you should choose Titanium Cookware?

    Titanium is alloyed with other cooking-stable materials to be assembled into the final shape and then used. You can not use direct titanium to put on the stovetop, over temperature, and let the recipe be cooked into the best of color, and taste.

    This is because pure Titanium cannot be expected to provide the ideal surface for the ingredients to sear and sauté and also it’s not health-hygienic in such concentration.

    You get a free hand to choose the other, contributing material yourself, for a personal reason. Let’s check on what reasons should you consider having titanium cookware this time.

    1- It cooks fast: Yes, one of the many reasons we may have a love or hate relationship with any cookware type is its cooking readiness. In this century, when we prefer ordering pizza over cooking it ourselves because pizza will be available sooner than a series of self-effort. Titanium cookware heats up quickly, so you can satisfy your hunger even faster when you’re eager to eat. It ensures you won’t go hungry!

    2- It’s easy to maintain: Cookware can quickly become unattractive with just a few scratches, or even just one.. An unsatisfied chef with the looks of the pan or pot he’s going to use can never cook confidently. Speaking from personal experience, you might find yourself reluctant to cook with it and secretly wishing it wasn’t in your kitchen at all. But the use of titanium makes the surface super resistant against scratches and it would not get one until you do it on purpose.

    3- It’s lightweight: Yes, using utensils daily just to find out that it’s heavyweight is extremely uncomfortable to hold after a tiring day can be a drawback to your hopes attached to it. You will want to cook but you will not want to cook in that heavy cookware. Also, lightweight cookware makes the best companion in travel and that’s when will develop a bond with this cookware.

    4- It’s strong: Titanium cookware is pretty good at enduring the heat of the stove and your mood as well as any other cookware material can. It does not get any bents nor does it break off easily. The durability is definite and performs as any good cookware does in the long term.

    The layer-up of different materials contacted together makes it thick and sturdy to bear whatever comes through.

    5- It’s safe: The concentration of titanium used in Titanium cookware does not affect our health negatively. It provides us with essential nutrients, which we absorb through the cooking surface.

    Top 10 Best Titanium Cookware to Try Out this Season

    Brand NameModel No.In the BoxFeaturesPrice 
    Woll Nowo1132NL12.5” inches wokMetal utensil safe, ovenproof side handles up to 480 degrees F, Safety glass lids, Optimal thermal absorption, PFOA free, Limited lifetime warranty, etc.Check Price 
    Snow PeakSTW- 001T- 3 PcEqual-sized large pot, small pot, and fry panRounded edges, Lightweight, Quality sturdy construction, Nesting, Best for traveling, Durable, etc.Check Price 
    SALONSaflon, 10 Pc8” inches and 9.5” inches fry pan, 1.5- Quart saucepan with lid, 2- Quart saucepan with lid, 4- Quart sauté pot with lid, and 8- Quart stockpot with lidScratch-resistant coating, Dishwasher safe, Heavy-gauge 4mm forged aluminum, Soft and cool touch handles, PFOA/ Lead/ Cadmium free, 3x more durable, etc.Check Price 
    T-falE918SE, 14 Pc10.25” inches square griddle, 8” inches fry pan, 10” inches fry pan, 11.5” inches fry pan, 5- Quart Dutch one with a cover, 3- Quart saucepan with cover, 3- Quart steamer insert, 2- Quart saucepan with cover, and 1- Quart saucepan with coverHard- titanium non-stick structure, Thermo-spot technology, Oven safe up to 400 degrees F, PFOA/ Lead/ Cadmium free, Riveted handles, Vented lids, etc.Check Price 
    Black+ Decker833798” inches fry pan3- layered thick base, Heat-resistant handle, Even heat distribution, Easy to clean non-stick interior, PFOA free, etc.Check Price 
    Cuisinart66- 14N, 14 Pc18 cm multi-steamer insert, 1- Quart saucepan with lid, 2- Quarts saucepan with lid, 3- Quarts saucepan saucepan with lid, 8- Quarts stockpot, and 8” inches skilletHard-anodized exterior, Unsurpassed heat distribution, Tempered glass cover, Drip-free pouring, Metal utensil safe, Even heat distribution, etc.Check Price 
    Smart Cook82008, 4 Pc8” inches Dutch oven
    with lid, 10” inches fry pan, and 10” inches sauté pan
    Well-built and sturdy, Good price, Health reliable titanium material, Fast heat conductivity, Glass lids, Dishwasher safe, etc.Check Price 
    Scanpan10203000, 3 Pc10” inches fry pan and 4- Quart stockpot with lidEven heat distribution, Riveted handles, Interchangeable glass lid, Oven safe up to 500 degrees F, Dishwasher safe, Lifetime warranty, etc.Check Price 
    T-falC561SC, 12 Pc8” inches fry pan, 9” inches fry pan, 1- Quart saucepan with lid, 2- Quart saucepan with lid, 3- Quart deep sauté, 5- Quart Dutch Oven with lid, Solid spoon, and slotted spatulaThermo-spot heat indicator, Dishwasher safe, Extra durable forged construction, Riveted soft-touch handles, Oven safe up to 350 degrees F, Limited lifetime warranty, etc.Check Price 
    Anolon81878, 10 Pc8” inches French open skillet, 3- Quart sauté with lid and helper handle, 10” inches French open skillet, 1.5- Quart saucepan, 2- Quart saucepan with lid, and 8- Quart stockpot with lidDishwasher safe, Heavy-gauge hard-anodized aluminum construction, Fast heat distribution, Oven safe up to 500 degrees F, Ergonomic stainless steel handles, etc.Check Price 
          

    What is the drawback of Titanium cookware?

    It’s heavy on the pocket, yes, it’s more expensive than normal cookware. For those whose budgets are narrow and can not afford to pay more than they are willing to pay for average cookware in the market, you can not have Titanium cookware. Regardless of its impressive performance, the price can lead you to reconsider whether you need that cookware.

    Wrapping Up

    This was the detailed analysis of Titanium cookware as a review and the best Titanium cookware you can grab in hand readily. The only best words we can deliver in the end is to take care of the cookware no matter how strong it accounts to be.