We’re living in a technology-driven era. All of our typical day-to-day tasks are driven by technology. With the rise of cooking blogs, Pinterest, and online shopping, finding new recipes and buying your dream cookware has become much easier.
The technology has also familiarized home chefs with new and innovative cookware. One fine example is the Dutch oven. These heavy, durable, and versatile cooking pots look very similar to traditional pots, but it is exceptionally versatile than those traditional ones. If you’re not familiar with this cookware, this guide is for you. It covers everything you need to know before buying and using a Dutch oven.
What is a Dutch oven?
A Dutch oven is a thick and durable pot with a lid. These pots are handy cooking tools that people have used for a long time to make different kinds of food. These are ideal for slow-cooking, soups, stews, camping, sauces, and more. Dutch ovens come in different materials and styles.
You’ll find Dutch ovens made from cast iron, enameled cast iron, aluminum, and ceramic. Traditionally, they were made only from seasoned cast iron. Before we talk about how to use them, let’s clear up a common misunderstanding:
Are Dutch ovens and French Ovens the same?
It is a major misconception among home cooks. These two types of pots are not the same. The main difference is in their insides: Dutch ovens are usually made of cast iron, while French ovens have an enamel coating. There are also other differences between them. I hope this clears your misconception.
Dutch Oven Types
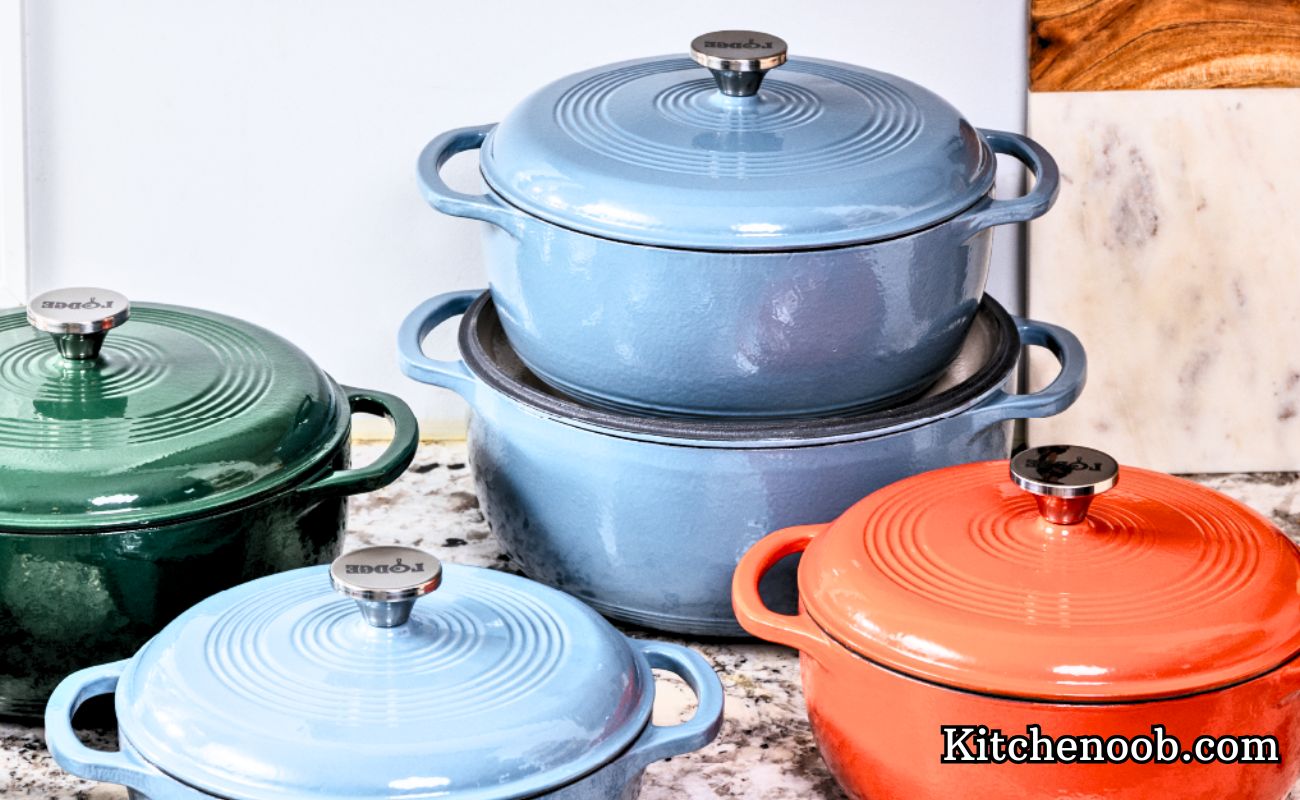
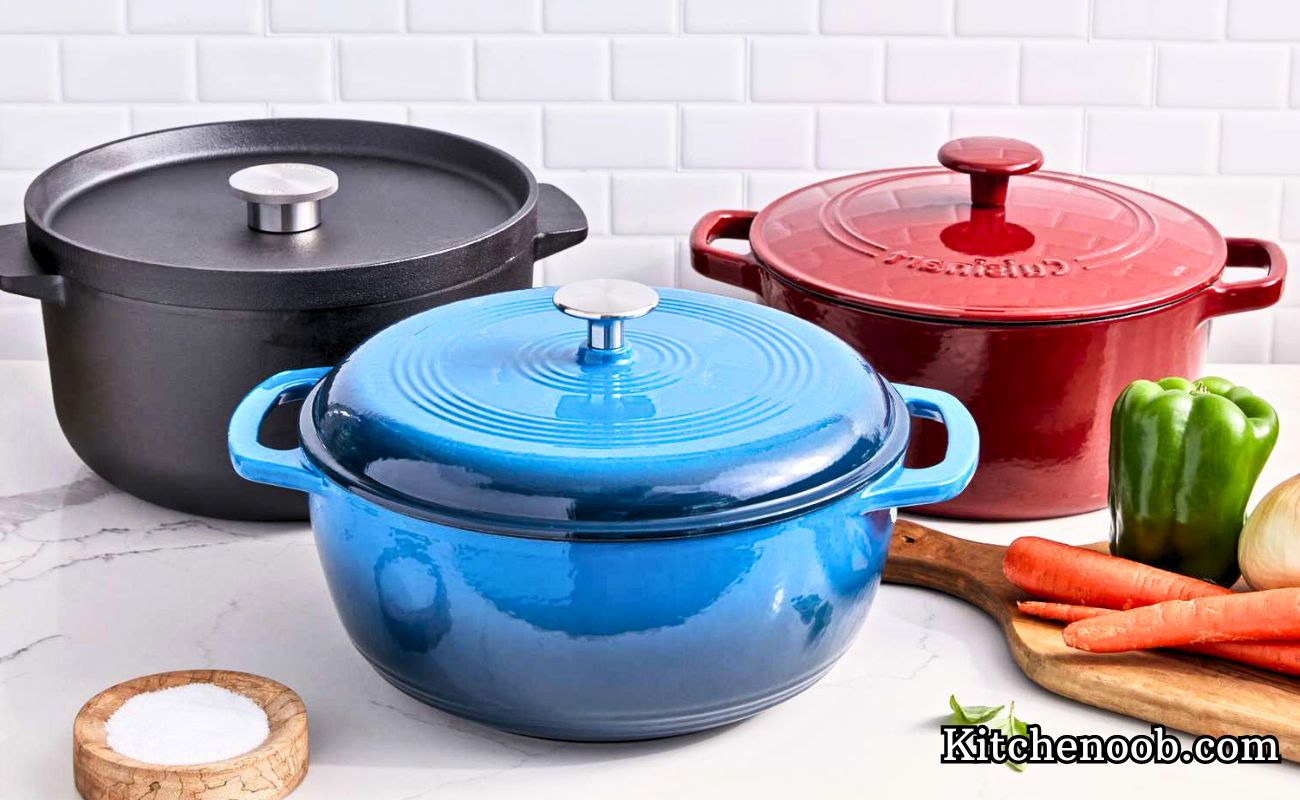
Mostly, all Dutch ovens have the same shape, but they have different colors, sizes, and materials. Some common types you’ll find on the market are:
Bare cast-iron Dutch ovens: This type is perfect for rugged uses. Bare cast-iron Dutch ovens are great at holding heat for a long time, making them perfect for slow cooking at low temperatures. However, these Dutch ovens require timely and adequate maintenance. You cannot throw them in your dishwasher. Instead, their delicate surface requires special and thorough cleaning. With proper cleaning and care, these can last you a lifetime.
Enameled cast-iron Dutch ovens: Technically, these are French ovens—let’s not get into the debate about it. These have become quite popular in present times. They have all the benefits of traditional Dutch ovens, but they’re easier to take care of. Further, their durability, versatility, functionality, and appealing looks can’t be ignored. The one drawback of these types is that they are more expensive than the others.
Ceramic Dutch ovens: Ceramic Dutch ovens are great for beginners. They are lighter than other types, making them easier to handle. They offer almost all the benefits of the traditional and enameled cast-iron Dutch ovens. However, their durability is not the same. Also, they aren’t the safest to use at very high temperatures.
Dutch Oven Maintenance
The best way to clean Dutch ovens is right after you use them, just like other cast-iron cookware. Cleaning is quick and easy—just use boiling water and a soft brush or sponge. Always store your cleaned and oiled Dutch oven in a dry place with the lid on, but don’t seal it completely. Leave a little space for air to help remove the smell of oil.
What is a Dutch Oven used For?
If you don’t have a high-quality Dutch oven in your kitchen, it’s time to get the one without thinking twice. The unit is great for all kinds of recipes, and you can use it on the stovetop and in the oven. Here are some ways to use your Dutch oven:
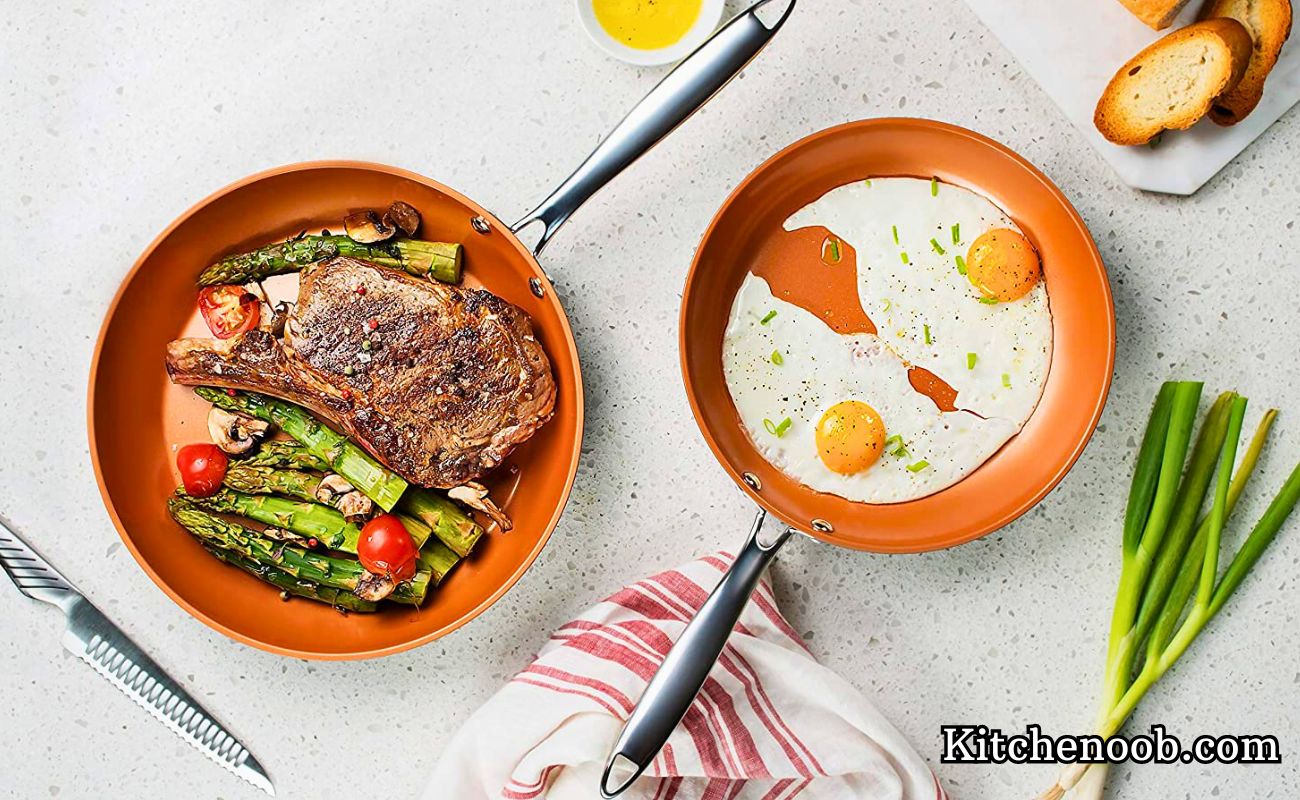
Soups and stews: Dutch ovens are the perfect choice for slow and low cooking. Thus they are ideal for preparing for the meaty soups and stews, especially in chilly winters. Plus, they can hold a large quantity of soup or other liquids.
Braising meat: Dutch ovens are made up of premium material that heats up quickly and evenly. They hold heat well, so you can braise meats and vegetables perfectly.
Bread-making: The Dutch ovens have much thicker walls and heavy lids that are perfect to create a steamy situation. So you can safely use them to keep dough fresh and moist.
Camping: Yes, you can also use some Dutch ovens for outdoor cooking! They are also great for use over open flames or a campfire. Check out our buying guide for the Best Camping Dutch Ovens! In addition to the above-mentioned uses, you can also use them for cooking rice, grains, potatoes, fried foods, and more.
Read more: Best Camping Cookware
Which one should you Buy?
Le Creuset:
Le Creuset is a well-known cookware brand that’s more than just a regular brand. It offers a wide range of high-quality French cookware. Since it started in 1920, it has built a strong reputation. Le Creuset Dutch ovens are high-end options. They come in bright and bold colors and have a classic, elegant look. It’s not just about the cookware’s appearance; in terms of cooking, these are the first choice of many professional chefs across the globe
Staub:
In simple terms, if Le Creuset is the “Mercedes-Benz” of cookware, then Staub is the “BMW” of cookware. The Staub Dutch Ovens are incomparable when it comes to slow-cooking of meat and vegetables. Furthermore, these are also the best for simmering hearty stews and delicious soups. For overall cooking, Staub is the best cookware brand on the market. Plus, it is simple to maintain well. As for aesthetics, usually, Staub’s cookware is sleeker and features a sophisticated style
Dutch Oven Tips
To acquire the maximum benefit from your Dutch Oven, here are some pro cooking tips for you:
Always clean and dry Dutch ovens immediately after cooking in them.
Don’t allow water to sit in it, or don’t expose it to water; otherwise, it can catch rust.
If using a Dutch Oven on coals or a campfire, ensure that it is filled with water or foodstuff before placing it on fire or coals. And keep monitoring the heat. An empty Dutch oven can ruin its seasoning quickly.
The main benefit of a good Dutch oven is that it lets you create layers of different flavors in your dishes.
Your Dutch oven’s shiny, enameled surface may look nonstick, but it’s not as smooth as you might think. So, don’t hesitate to use oil or butter when preparing meals in a Dutch oven.
A Dutch oven stays warm much longer and even after you remove it from the heat source. Hence you can benefit from it by using it as a serving pot.
Dropping a Dutch oven will be a total loss as it can break or crack more quickly and more easily than you think!
Never drop a hot Dutch oven into cold water, and don’t put frozen food in it, as this can damage it.
The new code of fashion demands you to nourish your health not just by the food you eat but also by the tools you cook with. Keeping this in view, the experts generated ceramic-made utensils that require less heat, and even less oil but deliver full nutrients. That’s a fair game.
What is Ceramic cookware?
Ceramic cookware is coated with aluminum or other metal that boasts a glazed surface to be non-stick, making the food toxin-free, quick and the utensils easy to handle. For other reasons, it saves time and is certainly the need of every kitchen holder.
Types of Ceramic Frying Pans:
There are essentially two categories of ceramic frying pans: i- Pure Ceramic frying pan It is made up of ingredients such as clay, minerals, and quartz sand. ii- Ceramic-coated frying pan On the other hand, this type is made of aluminum that is then coated with some polymer.
However, both of these differ in quality and performance.
How to choose the best ceramic pans?
Before you head towards the market to purchase or repurchase a frying pan for your kitchen, have a look at the buying guide that may help you out in making a safe decision. 1- Price Decide your budget and the necessity, either you want a complete range or the frying pan alone and then purchase. 2- Use See what has got you to buy a pan. This point will help you figure out your budget as well. If you just want a pan to make daily easy dishes on the stove or the one to be put in the oven. 3- Cleaning Though the majority of the ceramic tools are completely effortless to clean still do check on the internet reviews once if your likely-to-buy product has any issue while cleaning. 4- Coated or Pure Ceramic So this is a challenging step to cross for you may find yourself confused as each of them has some precautions to follow that will be mentioned on the box. Have a check on the spot. 5- Accessories It depends on the need if just a single pan alone can do the job or if you want to have other many sizes and range of pots.
Evaluations of the 10 Best Ceramic Frying Pans
Model
Features
Price
Chantal SLIN63-24C Induction 21 Steel Ceramic Coated Fry Pan
Ceramic coating, Nickel, PTFE-free, Large & stay-cool handles, Easy to clean, Affordable, 2-year warranty,
Check Price
Cook N Home NC-00359 Nonstick Ceramic Coating 10-Piece Cookware Set
Made of thick gauge aluminum, Nonstick ceramic coating, Dishwasher safe, Even heat conduction, glass lids to view food, comfortable Handles,
Check Price
Viking Professional 5-Ply Stainless Steel Fry Pan
Professional 5-Ply construction, safe up to 600°F, Non-reactive, PFOA/PTFE- free, Dishwasher safe, made in the USA, Lifetime Warranty, Signature Viking stay-cool handle
5-ply bonded construction, nonstick fry pan, even heating, Oven safe, optimized for induction, dishwasher-safe, Made in USA, lifetime warranty, easy to clean
Chantal, an enterprise driven by an engineer, Heida Thurlow, is acquainted with the cooking tactics being a female herself and thus she designs every model bearing the ingredients in mind.
The 10-inch ceramic fry pan is adequately even and wide to spread your egg in all and to fry the grilled chicken for dinner and wholesome vegetables for noon.
The color of the pan is silver and is forged with copper steel and a kick of Titanium to add to its vigorousness and maintenance.
The Japanese steel used in manufacturing is quite famous for its durability around the world and also the steel is good for quick heating, eating healthily, and saving time.
However, the cleaning is a breeze because of the non-stick ceramic coating to which the leftover food particles do not stick.
It is oven-safe up to 500°F and is PFOA/PTFE-free, which seems to be the tool of health-oriented people.
One of the best ceramic fry pans, being enhanced with all this virtuosity one needs in a kitchen, it costs not much as under $60 only.
⁃ Dimensions: 18.5 x 10 x 2.2 inches ⁃ Weight: 2.45 pounds
2- Cook N Home NC-00359 Ceramic Coated nonstick 10-piece cookware
Cook N Home NC-00359 ceramic-coated nonstick cookware has been processed by Newly International Housewares which is PTFE-free, PFOA-free, cadmium-free, and also lead-free.
The kitchen instruments are available in 2 colors: green and red. The cost-effective Cook N Home package has a composition of thick gauge aluminum that prevents the surface from getting hot spots.
This under $100 cooking range comes as a 10-piece set, ample to meet all the kitchen cooking or cuisine requirements.
The cookware tools are super easy to clean, no extra treatments are needed to get rid of the smell and stain.
Moreover, plain handling is another amazing treat to serve the dish easily. As well as the glass lid lets you watch the stuff cooking inside without having it to be removed off and on.
Open the Box and Get: It includes 1 Quart Saucepan, 2 Quart Saucepan, 3 Quart casserole pan, 5 Quart Dutch oven, an 8-inch sauté fry pan, and a 9.5-inch sauté fry pan.
⁃ Dimensions: 20.5 x 13.5 x 8 inches ⁃ Weight: 16 pounds
3- Viking Professional 5-Ply Stainless Steel Fry Pan, 12 Inch
Viking is a brand of ultimate performance, furnishing a 12-inch 5-ply fry pan that implies a 5-layer coating for superior heat induction, thus yielding quality outcomes.
It has been fabricated and packed in the USA.
Though admired for its performance, it is constructed with an aluminum core, an 18/10 stainless steel interior coated with Eterna, and the exterior formulated with a satin finish.
Featuring a cool design, an indulging round shape that is 1.75 inches deep, and low flared sides with a stainless handle to toss the food like a master chef, owning it has become a necessity.
It is under $200 and symbolizes the elite food preparation, that lasts for decades.
It is oven and grill-safe up to 500°F/260°C and dishwasher-safe.
It carries a lifetime warranty and so this
the factor is ample to estimate its durability.
– Dimensions: 20.9 x 12.3 x 1.9 inches – Weight: 3.1 lb
4- T-fal E93808 Professional Nonstick Fry Pan, Nonstick Cookware, 12.5” Inch Pan
T-fal non-stick frying pan bears a 12.5” inch surface with a heat indicator function to alert you when the pan is ready to put the stuff inside for cooking.
It is in black and costs under $30, let yourself have really good stuff on a budget.
This pan is made of a stainless steel base, inviting a powerful cooking experience, making it a perfect pick for everyday use for healthy and delicious dishes.
Moreover, the pan has a silicone handle for smooth and comfortable grasping leading to easy shaking and tossing.
In addition, it is fairly suitable for all cooktops, the model has been peaked with amazing qualities.
It is dishwasher safe and does not drive you nuts while ridding it of the annoying grease, also is oven safe up to 400 degrees F.
Who would not prefer a product with a lifetime warranty over a couple-of-years warranty?
Grab this pan! It will not disappoint you either in cooking as well as in striking it over the head of a thief when he broke in.
⁃ Dimensions: 18 x 12.5 x 2.5 inches ⁃ Weight: 2.3 pounds
Tips from Manufacturers: • Begin with employing low and medium heat • Avoid letting liquids boil dry • Keep the cooktop even
Read more: 10 Best Cast Iron Skillets
5- Tramontina 80110/42DS Style Ceramica 01 8-Inch Fry Pan
Tramontina 80110/042DS Style Ceramic is an 8-inch pan that is PFOA-free, PTFE-free, cadmium-free, and also lead-free. It has been built of heavy gauge aluminum.
Italy made best ceramic frying pan is assembled in the USA and is convenient in a variety of sound colors such as metallic copper, metallic sand, and red rhubarb.
The new colors make cooking even more fun.
With an incredible price that’s just under $20, it is cold-forged for even heat distribution.
Although it is capable of handling up to 350 degrees F (oven-safe) and 176 degrees C.
⁃ Dimensions: 14.4 x 8.2 x 1.5 inches ⁃ Weight: 1.02 pounds
6- Le Creuset Toughened Nonstick 12-inch Shallow Fry Pan
Le Creuset Toughened Nonstick 12-inch shallow frying pan has been blessed with a unique design and costs under $150. It is super easy to use and even super easy to handle with a slightly large handle to pour and put professionally.
Make different dishes and win the hearts of people around you, best ceramic frying pan for everyday cooking.
It is PFOA-free and triple reinforced, and will never rust or flake being there present in your kitchen cabinet for years.
Be careful to use medium to low heat with a maximum temperature of about 500 degrees F/ 260 degrees C. The heat-resistant lids are oven-safe and retain moisture.
⁃ Dimensions: 22.5 x 12.3 x 2.5 inches ⁃ Weight: 2.6 pounds
7- Calphalon Unison Nonstick 8-inch and 10-inch Omelette Pan Set, Black
Calphalon Unison Nonstick 2-piece pan set, 8-inch, and 10-inch can be bought in black color to fry and toss as the professionals do in 5-star restaurants, they must be using the same pan who knows!
It costs under $150 only.
Since there are two best ceramic frying pans made of two nonstick surfaces each, you can make two omelets at one time for a quick breakfast.
The pan has fine sloped sides for the sharp tossing of the eggs, pan pizza, and chicken pieces.
It is very easy peasy to clean and needs merely warm soapy water and nothing else.
Further, the quadruple riveted stainless steel handles remain cool even after hours of being on the stove.
No worries as long as it is with you, make pancakes, fry fish, or toast bread. It will handle all.
The frying pan is oven-safe up to 500 degrees F and 260 degrees C.
⁃ Dimensions: 10.2 x 6 x 19.8 inches ⁃ Weight: 1 pound
8- GreenPan Lima 3D 8-Inch Hard Anodized Non-Stick Ceramic Fry Pan for Eggs and Pancakes
Green Pan Lima 3D I Love Eggs & Pancakes 8-inch pan is available in gray color and also in cream color with the size of 11 inches, found just under $30.
For background, the manufacturers are The Cookware Company who were the first to bring the trend of using nonstick and they pretty much know how to maintain their customers.
The 3D feature leads to 3 surfaces: flat for liquid foods, dotted for frying fish and vegetables, and lastly the ribbed pattern for meat- innovative at its peak.
However, it is not just ceramic but made of Hard Anodized, Thermolon ceramic nonstick to stabilize the nutrients of recipes, the best of its own. There are no harmful traces of any cadmium and lead to mess with your valuable health.
⁃ Dimensions: 14.6 x 8.3 x 2.8 inches ⁃ Weight: 1.15 pounds
9- All-Clad d5 Stainless Nonstick Covered 12 Inch Fry Pan
A 12-inch All-Clad Bd55112NSR2 d5 brushed is large enough to carry a bigger portion of the recipe in it.
The utensil is made in the USA and retails for under $250.
The color of this pan is silver and compliments the kitchen countertop as well.
With the construction of stainless steel and Patented technology of five alternating layers of aluminum, it takes care of the texture of the food. Bon Appetite!
The cleaning of the pan is a breeze and does not demand much effort.
Better the cooking, better the taste and color.
It is PFOA-free and oven-safe up to 500 degrees F.
⁃ Dimensions: 21.1 x 12.5 x 4.2 inches ⁃ Weight: 3 pounds
The best Vremi 8-piece ceramic nonstick cookware set is now within reach in 3 vibrant colors: green-white, blue-white, and yellow-white.
The above colors are radiant enough to add a little class to your kitchen counter and dining table.
This set is quite handy for just under or around $100.
Although, it is PTFE and PFOA-free, no chance of venomous particles landing in your stomach. Be easy and be full.
Well, what about trying a pancake recipe for children in the afternoon to cheer them up?
That’s possible and effortless with the help of Vremi pots and pans.
The cleaning has been made straightforward forward for which you barely need some warm water with a little soap mixed in it and rinse it off later.
No hard and harsh techniques are to be applied.
However, it can also release the steam past the small gaps in the lid while you cook.
Open the Box and Get: It includes 1x small Dutch oven with lid, 1x large Dutch oven with lid, 1x shallow casserole with lid, 1x medium angled frying pan, 1x large angled frying pan, Die-cast aluminum body, nonstick ceramic coated interior, heat resistant enamel exterior, bakelite handles, and knobs.
⁃ Dimensions: 23.6 x 7.9 x 15 inches ⁃ Weight: 18.65 pounds
Wrapping UP:
Life is short but not easy to find yourself the perfect product, you must have realized that it is a lie because we have made it super easy though.
In a range of overused, trusted, and prominent cookware sets out there, you will find All-Clad in the first rows. If you already have it or if you are planning to have it, let me tell you cleaning is a part of cooking, right after cooking.
As people know a good number of cleaning methods, they don’t know which one to apply to which material. This is the dilemma of our society first and the kitchen later.
I have seen many people ruining their expensive and newly bought All-Clad pans just because their knowledge was deficient to give their cookware the right treatment. This ill behavior of the Chef saddens the pot or pan and it refuses to work properly, yes not suddenly but gradually with time. This is how a small child responds to your scolding, consider a pan the child too. You are simply going to lose it over some time.
What next? Buy a new pan? What about being careful in the first place rather than spending twice later?
That’s what I’ve been telling you since the beginning knowing the right cleaning method for the right cookware material is as important as having your meals daily.
I hope I’m not exaggerating with the explanation-examples. Since All-Clad is not about just one type, I am going to explain each type, for the whole All-Clad family.
Learn and spread the knowledge to other chefs.
How to clean All-Clad Pans:
First of all, All-Clad belongs to one of those branches that require the least attention and care to keep going. How bad is it to not invest that little?
As far as the stainless steel line of All-Clad is concerned, it boasts its shine among other cookware types and that is what we have to take care of.
On the other hand, the other All-Clad lines like anodized aluminum brushed aluminum, and copper-coated lines are all about their surface. You get to be lenient with the coated surface otherwise it’s useless to cook in if harmed.
Though the expert says, All-Clad is safe when put in the dishwasher safe but this is a half-confirmation. The constant washing of stainless steel in the dishwasher safe is a serious situation to encounter, avoid that. However, once in a while, when you are in a hurry is okay to go with the dishwasher. There is even more comfort in preserving its youthfulness on account of its shine and performance by hand washing it.
Here’s a brief overview of some of the main lines:
Procedure
Remove your All-Clad pan from its storage spot.
Fill the sink with warm water.
Let it sit there for two minutes maximum.
Take any cleaner of your choice, Barkeeper’s Friend and Bon Ami are two of my favorites.
Apply a little cleaner inside of the stainless steel pan.
Grab a damp cloth piece and spread the cleaner on the whole pan by rubbing.
Rub, rub, rub but be gentle. Do not leave any spot uncovered in the cleaner.
Rinse the applied cleaner with the warm water.
Now apply liquid soap all over the All-Clad stainless steel pan and start rubbing gently again
Rinse with warm water.
Pat dry with a clean cloth.
Dishwasher Safe?
While it can save you time, it can cost you the other way. After all, a machine is not as accurate and sensible as a human being can be. Though I support hand washing no matter which type is, if you don’t, it’s okay just avoid doing it regularly. As regards the dishwasher, if you own stainless steel or copper All-Clad, there is a green signal for you, fortunately. A big NO for the other ranges. Get it straight to your mind and let the other people know too.
Wrapping Up
With the handling, a breeze, avoiding the cooking sprays, overheating, and hard water for washing, your All-Clad is going to last a decade. Drying the pan just after washing saves it from water spots and unwanted stains. Plus, invest in good cleaners from time to time polishing with Bon Ami, Barkeeper’s friend, Mr. Mayer’s liquid soap, Dawn Foam, etc.
If you are looking for a cookware brand that gives you a lot of flexibility and options, is reliable, and has well-built and high-quality products, then look no further than this article as we’re going to talk about one of the best there is: Gotham Steel.
We know that your mind wandered to Batman’s Gotham City but no, that is not what this is about. It might be a new name for you which is why we will explain everything that you will need to know to be able to make an informed decision about your choice.
Their non-stick cookware includes pans, knives, pots, griddles, etc. Some of their qualities are that they combine non-stick ceramic with super strong titanium which sets them apart from the other brands which don’t employ titanium.
Other qualities that Gotham Steel shares with them are that their cookware doesn’t require oil or butter as everything slides off easily because of the non-stick surface. This also makes cleaning easy.
Furthermore, it is safe to be cleaned in a dishwasher is also safe to be used with metal utensils, and can withstand heat up to 500°. Additionally, it is PTFE/PFOA/PFOS free which are chemicals that can cause serious health problems.
Top 10 Gotham Steel Pans – Buying Guide
The top 10 Gotham Steel pans are as below:
Model
Features
Price
Gotham Steel Titanium Ceramic 9.5” Non-Stick Copper Deep Square Frying & Cooking Pan With Lid
Aluminium Construction, Oven safe up to 500°, Dishwasher Safe, 2 sizes available
Check Price
GOTHAM STEEL 10.5-inch Non-Stick Grill Pan with Ti-Cerama Surface
Non-stick, Dishwasher safe, Cool Handles, Safe from any chemicals
Check Price
Gotham Steel 9.5” Fry Pan with Ultra Nonstick Titanium and Ceramic Copper Coating by Chef Daniel Green
Award-winning Ti-Cerama coating, aluminum construction, Oven safe up to 500°, Dishwasher Safe, Stay cool handles, Toxin
Check Price
Gotham Steel Grill Pan – 10.5” Square Aluminum Grill Pan with Nonstick Surface
Gotham Steel 1371 Tastic Bundle 7 Piece Cookware Set Titanium Ceramic Pan
Toxin-free, Dishwasher Safe, Oven safe up to 500 degrees, Recipe Book Included
Check Price
Gotham Steel 10-Piece Kitchen Set with Non-Stick Ti-Cerama Coating by Chef Daniel Green
Ti-Cerama non-sticky surface, Oven safe, Dishwasher safe, Ultra-durable, Stay cool handles, Toxin free, scratch-proof, Safe to be used with metal utensils
Check Price
GOTHAM STEEL Smokeless Electric Grill, Griddle, and Pitchfork, Indoor BBQ and Nonstick As Seen On TV
Gotham Steel Titanium and Ceramic Non-stick Smokeless Stove Top Grill
unique design, durable, non-stick, High quality, Dishwasher safe, Grill top and drip pan included
Check Price
Gotham Steel 5 Quart Multipurpose Pasta Pot with Strainer Lid & Twist and Lock Handles
Titanium and Ceramic coating, Twist & lock handles, Transparent lid, Dishwasher safe, Oven safe, Durable, Modern design
Check Price
Gotham Steel Mini Egg and Omelet Pan with Nonstick Titanium & Ceramic Coating – 5.5”, Copper
Ti-Cerama coating, Ultra-durable, Scratch-proof, dishwasher-safe, Metal utensil safe, Oven safe up to 500° F, Rubber grip handle
Check Price
1. Gotham Steel Titanium Ceramic 9.5” Non-Stick Copper Deep Square Frying & Cooking Pan With Lid
A versatile pan with which everything is possible. Its large size and depth further facilitate cooking for a big group of people efficiently. What makes it unique is that it comes with a magnetic base. This enables the pan to be used on induction stoves which is very useful to people who are frequent travelers as gas stoves are not always available.
There is also a fine-mesh basket included in this set for deep frying that will help you to create delicious fried foods that are crispy on the outside and soft and juicy on the inside.
2. GOTHAM STEEL 10.5-inch Non-Stick Grill Pan with Ti-Cerama Surface
This grill pan is an economically wise choice since its excellent quality and versatility allow it to be used in both indoor and outdoor cooking.
3. Gotham Steel 9.5” Fry Pan with Ultra Nonstick Titanium and Ceramic Copper Coating
This non-stick pan is ideal for breakfast or any meal that you will be making in a moderate quantity. It is deep enough for stir fry but not deep enough to allow flipping of food items easily.
4. Gotham Steel Grill Pan – 10.5” Square Aluminum Grill Pan with Nonstick Surface
This grill pan has a square shape to provide a larger surface area for cooking appropriately big portions of meat. The Ti-Cerama non-stick surface of the pan allows braising, searing, and grilling without the need to use excessive amounts of oil. The result is a healthy, delicious food that is cooked just right.
5. Gotham Steel 7-Piece Tastic Cookware Set with Titanium Ceramic Pans
This set includes a square-shaped, deep-rimmed 9.5” pan, a circular 12.5”, and a 9.5” pan. Moreover, this set comes with a steaming rack and a frying basket!
6. Gotham Steel 10-Piece Kitchen Set with Non-Stick Ti-Cerama Coating by Chef Daniel Green
This set has three different sizes of deep pots and two frying pans of 8.5” and 10.5”. All of them share the usual Gotham Steel features: non-sticky, durable, high quality, dishwasher safe, and chemical free. Secondly, this set has two saucepans of 1.5 quarts and of 2.5 quarts capacities.
7. GOTHAM STEEL Smokeless Electric Grill, Griddle, and Pitchfork
Gotham Steel has a very interesting BBQ set as well. It includes a smokeless electric grill which makes sure whatever you cook is smoke-free; a griddle and a pitchfork. Not only is it perfect for indoor BBQ parties but it is also durable and non-stick.
8. Gotham Steel Titanium and Ceramic Non-stick Smokeless Stove Top Grill
With this unique design, who wouldn’t be interested in buying this grill? Gotham Steel is famous for having high-quality products and not just that, but products that are durable and non-stick too.
9. Gotham Steel 5 Quart Multipurpose Pasta Pot with Strainer Lid & Twist
Who can say no when cookware is multipurpose and versatile? Well, not us.
10. Gotham Steel Mini Egg and Omelet Pan with Nonstick Titanium & Ceramic Coating – 5.5”
Gotham Steel has comfort and cute all locked in this mini-fry pan that is ideal for cooking your breakfast. A 5.5” frying pan can cook you omelets, eggs, and even pancakes!
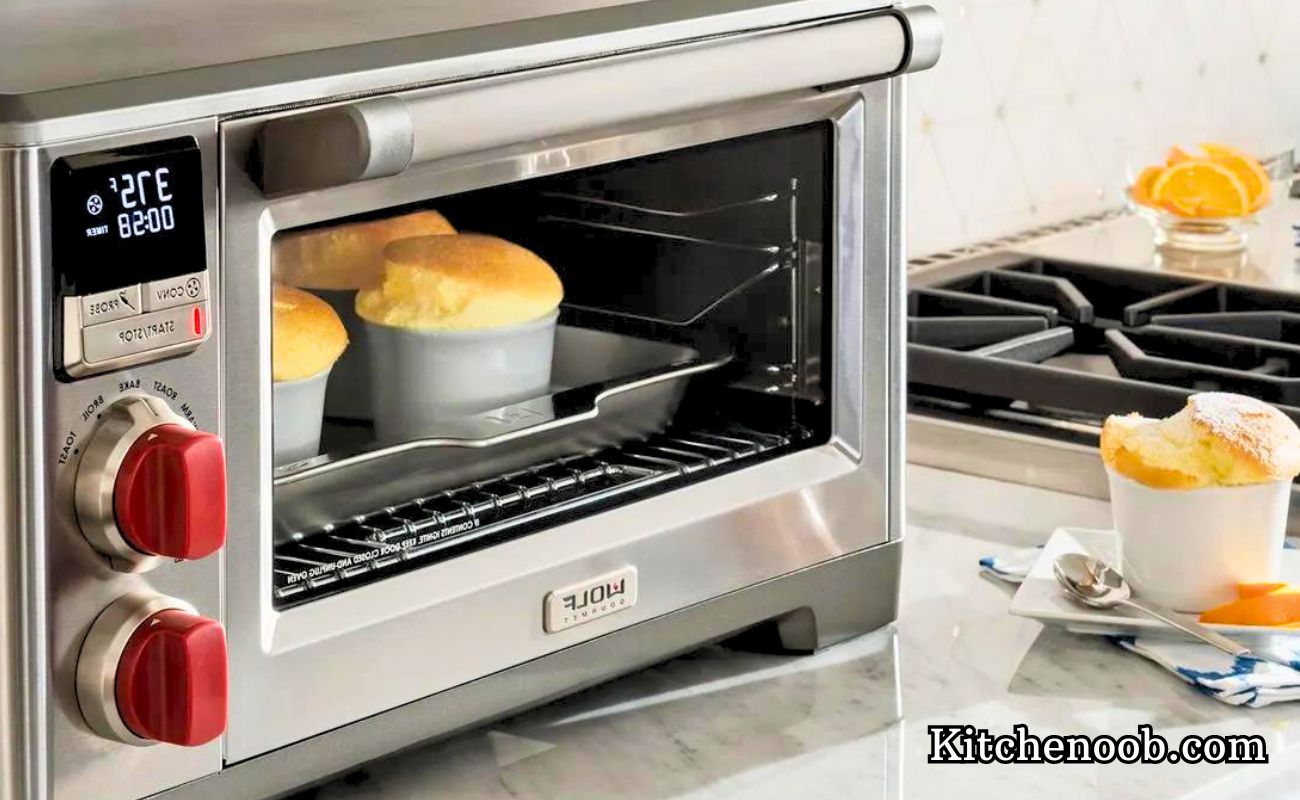
Cleaning Wolf oven racks is essential to maintaining the pristine condition and optimal performance of these high-quality appliances. Over time, oven racks accumulate grease, grime, and food residue, which can affect the oven’s efficiency and the taste of your culinary creations.
Whether you’re a passionate home cook or a professional chef, understanding the proper techniques for cleaning Wolf oven racks is crucial. By employing the right methods and using the appropriate cleaning agents, you can ensure that your Wolf oven racks remain spotless, hygienic, and ready to assist you in creating delectable dishes.
In this article, we will explore the step-by-step process and provide valuable tips to help you master the art of cleaning Wolf oven racks effectively.
5 Easy Peasy Ways to Clean Wolf Oven Racks
1: Soaking Method
On the top of our list for cleaning over racks, here comes a socking method that you can try easily in your home. Follow the steps below.
Remove the oven racks from the Wolf oven.
Please place them in a bathtub or large plastic bags.
Fill the tub or bags with hot water.
Add a generous amount of dishwashing liquid or an oven-safe cleaning solution.
Put the racks soak for a few hours.
Scrub the racks using a soft sponge or non-abrasive scrub brush.
Rinse them thoroughly with hot water and dry them before reinserting them into the oven.
2: Baking Soda Paste
At the second point of our list for cleaning over racks, here comes a baking soda paste method that you can use easily in your home. Follow the steps below.
Make a paste by mixing baking soda and water to form a thick consistency.
Apply the paste to the oven racks, focusing on stained or greasy areas.
Let it sit for 30 minutes, allowing the baking soda to break down the grime.
Scrub the racks using a soft sponge or brush.
Rinse the rack with hot water to remove residue.
3: Vinegar Solution
Here comes the third point of our list for cleaning oven racks, here comes a vinegar solution method that you can use easily in your home. Follow the steps below.
Fill a spray bottle with white vinegar.
Spray the vinegar generously on the oven racks.
Allow it to sit for a few minutes to loosen the dirt and grease.
Scrub the racks using a soft sponge or brush.
Rinse thoroughly with hot water to remove the vinegar smell.
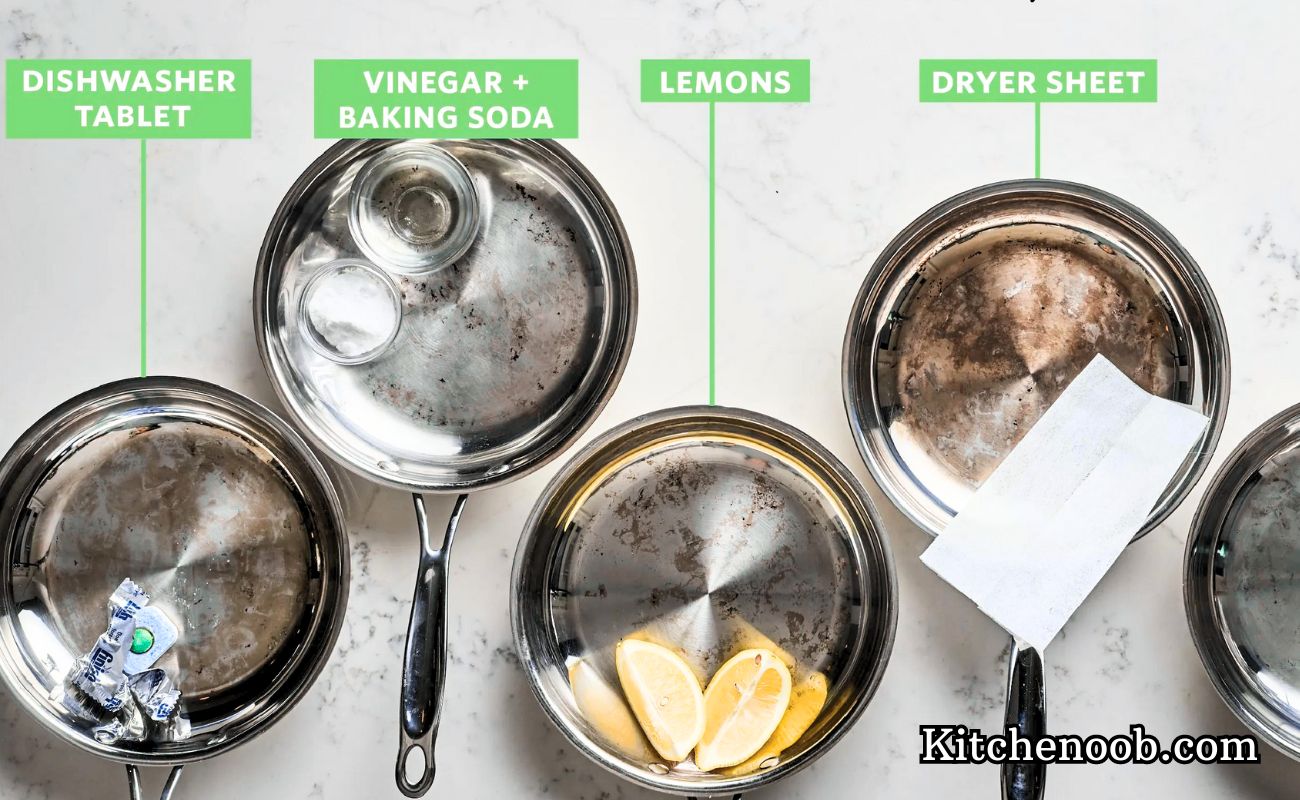
4: Dishwasher Method
At the fourth point of our list for cleaning oven racks, here comes a dishwasher method that you can apply at your home. Follow the steps below.
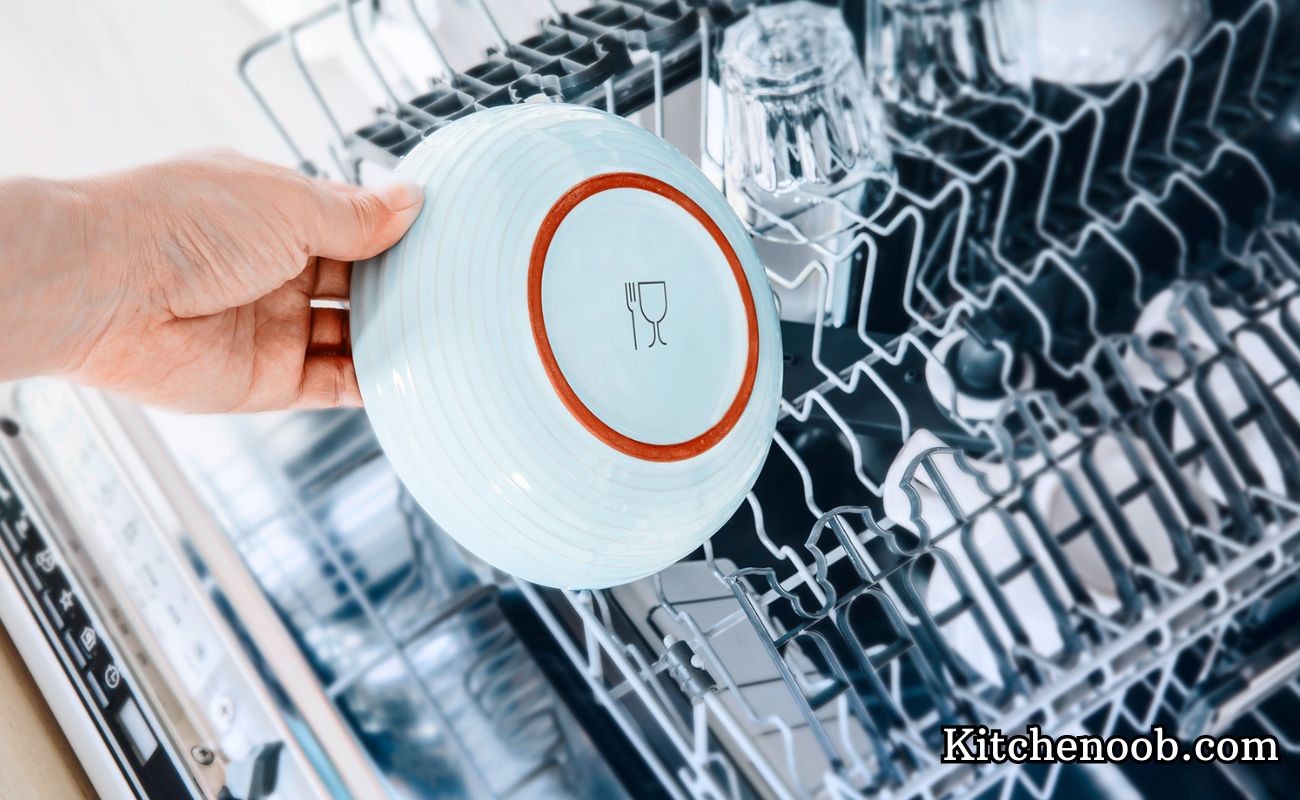
Check if your Wolf oven racks are dishwasher safe.
Place the racks in the dishwasher, ensuring they are not overcrowded.
Add a dishwasher tablet or a cup of dishwasher detergent.
Run a regular cycle with hot water.
Once the cycle is complete, remove the racks and inspect for any remaining residue.
If necessary, use a soft sponge or brush to scrub off stubborn stains before rinsing with water.
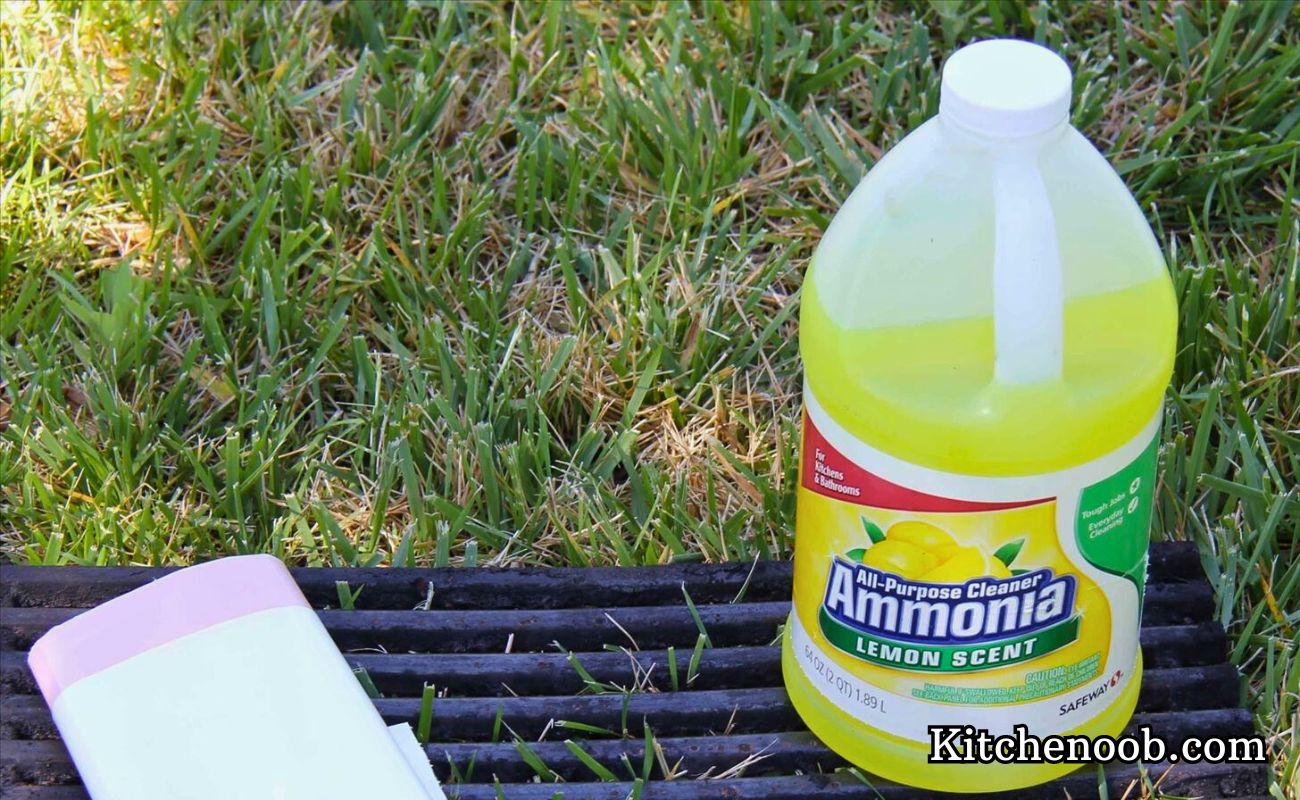
5: Ammonia and Plastic Bag Method
The last point of our list for cleaning oven racks is the ammonia and plastic bag method that you can apply at your home. Follow the steps below.
Place the oven racks in a large garbage bag.
Add 1/2 cup of ammonia to the bag, ensuring it is properly sealed.
Allow the bag to sit overnight or in a well-ventilated area for several hours.
Open the bag outside or in a well-ventilated space due to the strong ammonia fumes.
Remove the racks from the bag and scrub them using a soft sponge or brush.
Rinse the racks thoroughly with hot water before drying and reinstalling.
Remember to wear rubber gloves, work in a well-ventilated area, and follow safety precautions when using cleaning agents. Using these five cleaning methods, you can restore your Wolf oven racks to their original pristine condition and enjoy optimal cooking performance.
Wrapping Up
Cleaning Wolf oven racks is a vital task that ensures the longevity and efficiency of your prized appliance.
By utilizing the five effective cleaning methods outlined in this article – the soaking method, baking soda paste, vinegar solution, dishwasher method, and ammonia and plastic bag method – you can remove stubborn grease, stains, and residue, restoring your Wolf oven racks to their sparkling best. Remember to choose a cleaning method that aligns with your preferences and safety considerations.
Regular maintenance and cleaning will enhance your Wolf oven’s performance and provide a healthier and more enjoyable cooking experience. So, roll up your sleeves, follow these techniques, and take pride in maintaining your Wolf oven racks to perfection. Happy cooking!
We completely agree with you guys that cleaning an oven is not an easy task, and things get quite messy during the process. But all of you will agree that cleaning the oven is necessary; the appropriate word will be ‘compulsory’.
An unclean oven looks horrible, and it is not good for your health. Food bits stuck in the oven can catch fire and make it work less well. When using a dirty oven for cooking, the processing time will be much longer than normal, and results will be poor.
So, to handle all these issues and for the well-being of your family members, you should learn how to clean an oven properly and easily.
Today, in this guide, we will discuss some of the best ways to clean an oven and all the other details regarding the subject matter.
Methods for Cleaning an Oven
There are a lot of methods for cleaning an oven at home, you can follow the given methods. For learning step by step, follow the guide below.
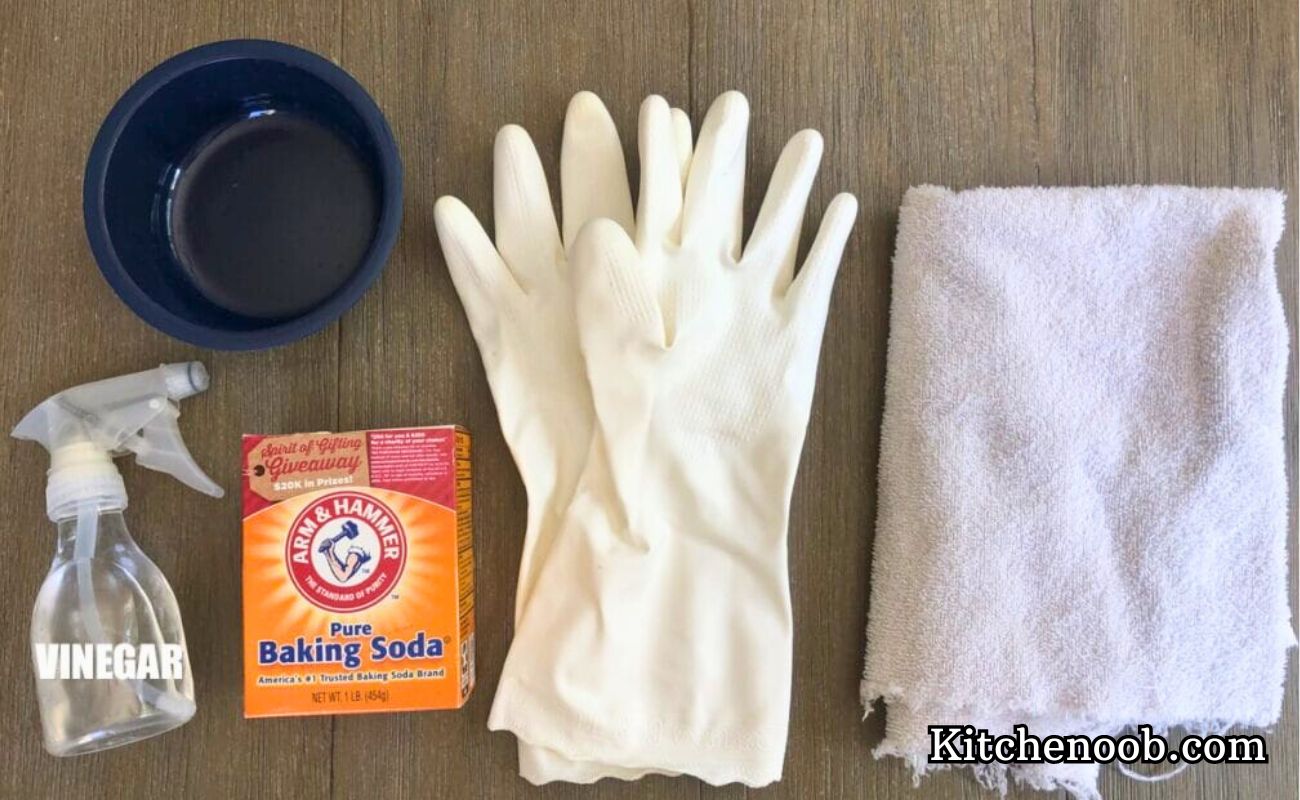
Cleaning your Oven with Baking Soda, Water, and Vinegar is easy and natural
First, remove the oven racks and all other things such as pizza stones, and anything removable. Place all these stuff separately so that you can clean them afterward.
Now, take ½ (80 or 90 grams) cup of baking soda and three tablespoons of plain water.
Mix both these ingredients thoroughly in any container. Mix them until you see a spreadable paste.
If required, you can add more water or soda. Keep in mind that you will spread this mixture later. So, it should not be too thin, nor too thick.
When the paste is ready, spread it on the inner side of the oven. Don’t spread the mixture on the heating element!
For this purpose, you can use a paintbrush. Spread properly in the oven, especially in the areas where grime and grease are present.
You can use this soda and water mixture on the oven door as well if it is too dirty.
Let the paste remain in the oven for up to 12 hours and close the oven’s door.
After a few minutes, you will see a change in the color of baking soda. It will turn brownish, and it is normal. This change of color happens because the mixture is absorbing the dirt and grime from the oven’s surface.
In the meantime, you can clean the oven racks and other stuff.
To clear off the paste from the oven, you will need a damp cloth and spatula. After 12 hours, you can wipe off the baking soda paste by using a damp cloth and a plastic or silicone spatula. Moreover, be careful and never use a metal spatula for scrapping as it can affect the finishing of your oven.
Now, take a ½ white vinegar and mix it with two cups of plain water.
Pour the solution into a spray bottle and spray it on the oven. The remaining mixture of baking soda will start to foam. This will remove all the baking soda from the oven’s surface.
Wipe off any residue remaining in the oven with a new and wet dishcloth. And soon, you will see a shiny interior of your oven.
If you have used baking soda on any other accessory of the oven such as racks, clean them too with vinegar and water spray.
Put the racks back in an oven and enjoy baking in a clean and tidy oven.
How to Clean an Oven with Lemons
Apart from using it in your regular meals, it is being used to clean your oven. You will need two lemons, water, and a scouring pad during the process of cleaning your dirty oven.
To begin with, cut both the lemons and squeeze the juices in any container such as a dish or bowl. After squeezing both lemons, put the lemon’s casing in the same dish.
Now, fill the bowl or dish with plain water and put it inside the oven.
Turn on the oven and bake it at 200 degrees Fahrenheit for at least 25 to 30 minutes.
As the mixture heats, you will see the vapors clinging to the greasy stains and grime.
After thirty minutes, take the dish out turn off the oven and let it cool down.
When the oven is cooled down, take a scouring pad to remove the residue and grime (if any). You can also use a plastic spatula for this purpose.
Keep wiping until the entire oven is clean. After cleaning it, dry the oven with a soft cloth or towel.
NOTE: The oven will smoke a lot in this cleaning method. So, ensure you have enough ventilation.
How to Clean an Amana Self-Cleaning Oven
For cleaning a self-cleaning oven or amana self-cleaning oven you must follow the simple steps given below.
First, remove all the racks and other things from the oven. Put these things in a sink or at any other place.
Now, when your oven is empty, switch on the self-cleaning function.
Usually, the self-cleaning process takes three hours. And your oven will smoke a lot during the process.
After three hours or when the process is completed, turn off the oven and let it cool down.
Then, take a soft damp cloth or sponge, and clean the debris from the oven. Wipe until you see a shiny interior of your oven.
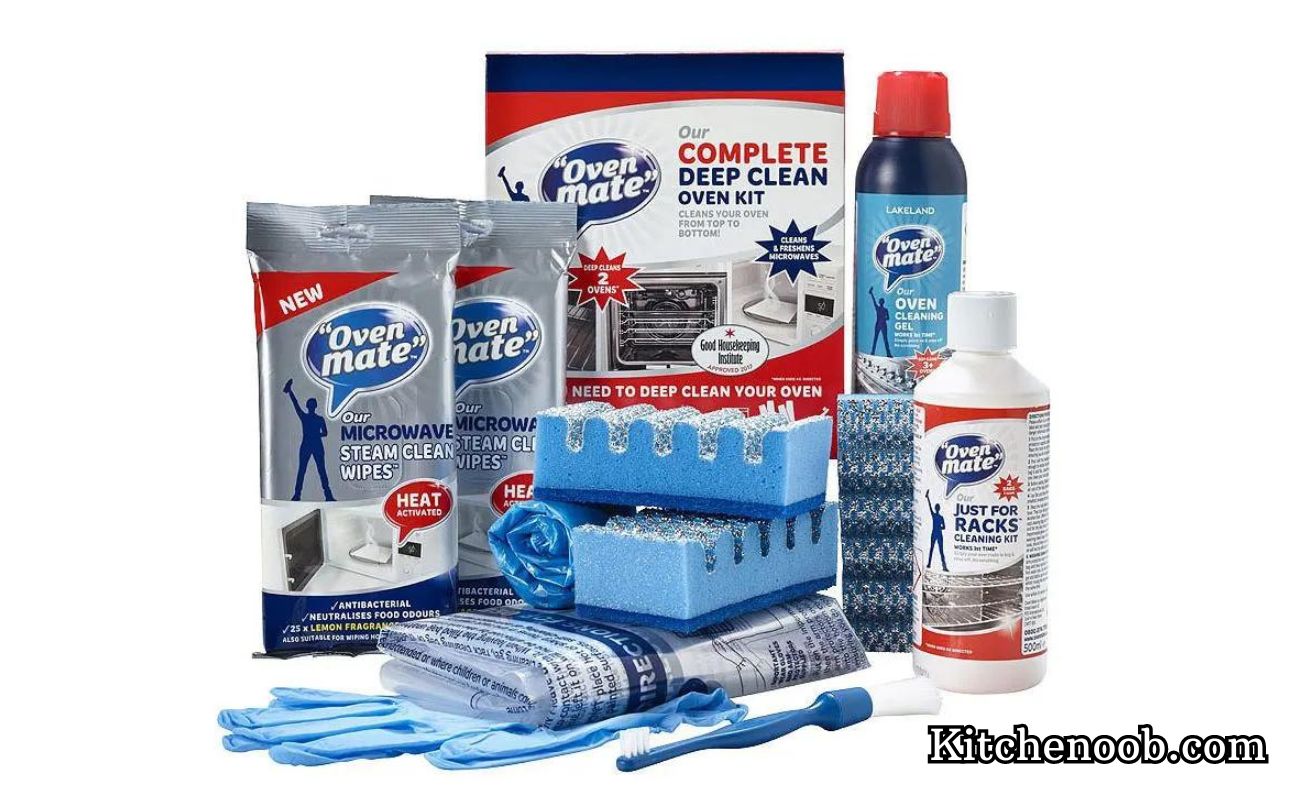
What is the Best Oven Cleaner
The Weiman oven and grill cleaner is a perfect household cleaner. The effectiveness of this de-greaser is excellent, and the unit is completely safe to use on oven doors, interior, broiler and drip pans, ceramic grills, drawers, and handles. This Weiman oven and grill cleaner also guards your appliances against corrosion, rust, deterioration, and germs. Hence it is a multi-purpose and efficient product.
According to the various user feedback, Weiman’s oven cleaner is an excellent choice for those folks who are looking for a reliable de-greaser. However, according to our experts, to remove greasy stains, you will have to spray multiple times on the affected surface.
Lastly, it is one of the most powerful oven cleaners on the market that has a bearable and pleasant smell.
Pros
It removes food residue, caked particles, and other grime from the oven.
Safe to use on oven doors and broiler.
Multi-purpose oven and grill cleaner.
Cons
Expensive oven cleaner as compared to the others in the market.
How to Clean an Oven with an Oven Cleaner
Oven cleaners will make the cleaning task quick and easier as compared to the natural cleaning methods. Below is the whole process for your review. Here’s how to clean an oven with an oven cleaner.
First, remove all the accessories from the oven as well as the oven racks.
Place old newspapers or paper towels on the floor beneath the oven. This is to save the floor.
Now, take a bottle of oven cleaner and spray it on the oven. Spray properly on all sides, doors, corners, etc. Shut the door after spraying.
Now, carefully read the maker’s instructions (usually mentioned on the bottle) and let the spray sit. Generally, cleaners take about 30 to 35 minutes.
In the meantime, spray the cleaner on the racks and other oven accessories.
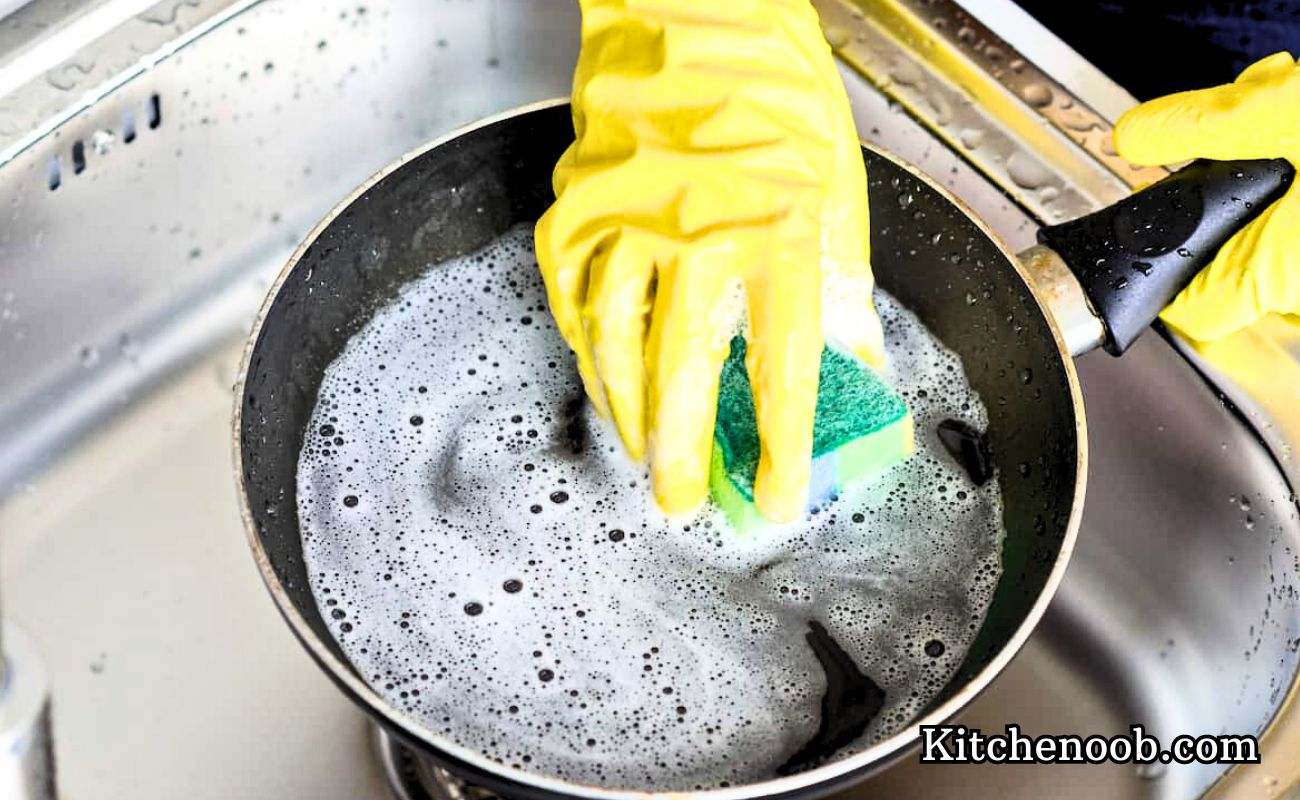
After 30 minutes, open the door of the oven and wipe thoroughly with a soft damp cloth. You can also use a sponge to remove residues and caked particles.
Clean the racks and other things with soapy water. After washing the racks, place them inside the oven, and the process is complete!
NOTE: Store the cleaner away from kids and pets.
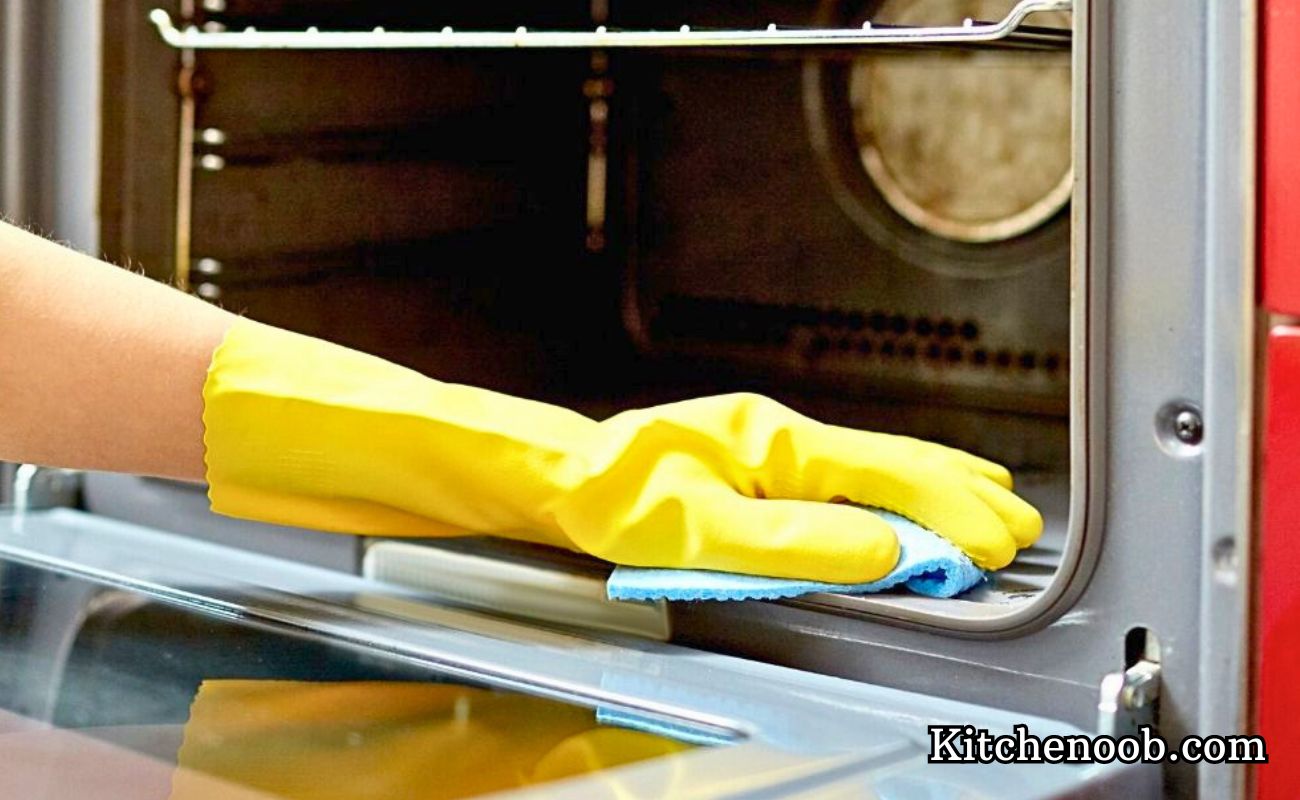
Which is the Good Gloves Option for Cleaning
ANZOEE is a trusted name in the industry. These reusable, silicone dishwashing gloves by Anzoee are versatile, and you can use them when cleaning your oven, bathroom, dishes, cars, floors, and even pets.
These Silicone dishwashing gloves by Anzoee feature a thick and soft brush that produces extra foam and also increases friction force.
Furthermore, these oven-cleaning gloves are approved by the FDA and are BPA-free. So, you will be using a certified and safe product. The ergonomic design of gloves is attractive, and you will not have any problem is using them. The grip is firm, and they feel good in the hands.
Finally, these silicone gloves for oven cleaning are resistant to heat up to 160 degrees and easy to clean.
Pros
Gloves are effective, and the grip is comfortable.
Keep your hands completely dry.
Gloves are heat-resistant.
Cons
Heat-resisting capability is not reliable
How to Clean an oven with Ammonia?
Ammonia is an excellent cleaner and, if you use it with care, it is entirely safe to use for cleaning purposes. You can use it to clean ovens, mirrors, and glass. Here is how to clean your oven with ammonia:
First, heat your oven to 150 degrees F and shut it off.
Now, take 1/2 cup of ammonia into a bowl and put it on the top shelf.
Then take a pan of hot boiling water and place it on the second shelf.
Shut the oven’s door and leave it there overnight.
Afterwards, wipe the oven with a damp cloth. You will notice that all the grime and caked food residue is removed. Just wipe it off thoroughly, and you are good to go.
How to Clean an Oven without Chemicals
Want to clean your oven without any cleaner or chemicals? The following method is the easiest and works well.
Remove oven racks
First, take out the oven racks and put in the soapy water. Wash the racks properly and dry them completely after washing. Some oven racks are safe to wash in a dishwasher, but we will advise you to check the manufacturer’s instructions in this regard. After washing and drying the racks, put them on the side.
Wipe the food residues
Now, remove all the food particles from your oven.
Use this mixture as the oven cleaner
Make a mixture by taking three parts of baking soda and one part of plain water.
Apply the mixture
Spread this mixture on the interior of your oven and around. You will have to use the extra mixture on the burnt-on spots. Don’t use the mixture on the heating element. Let the mixture sit overnight.
Clean the Baking soda
Now, remove the baking soda mixture with a wet cloth. You can also use a scraper for this purpose.
Vinegar Solution
Take a spray bottle and pour a part of vinegar and one part of water. Spray all over the oven and remove caked particles and the remaining baking soda mixture.
Place the oven racks
Now, put the oven racks back in their place. Your cleaning task is completed, and you can cook now.
Oven Cleaning FAQ’s
How to clean an oven door
A dirty oven door doesn’t look good, and you cannot monitor what is happening inside the oven. So, cleaning the oven door is equally important. Follow this method to clean the oven’s door.
Take three or four tablespoons of baking soda (according to the condition of your oven’s door) and two tablespoons of plain water.
Now, Open the oven door and apply the paste on the oven door.
Let it there for twenty minutes and then wipe it off with a soft, wet cloth.
How to clean an electric oven
To clean an electric oven, you will need baking soda and Luke warm water.
Take one-half cup of baking soda and ½ cup of water. Remove the racks and wipe the entire surface of the oven from the bottom, side, and top. A soft-bristled brush is also suitable for wiping away the dirt and grime. Now, apply the paste and let it sit for two to three hours.
After the time, remove the paste with a wet cloth or scraper. When all the paste is removed, put the racks back in the oven and you are done.
How to clean an oven without oven cleaner?
Covered above and below as well.
How long does it take to self-clean an oven?
Mainly, it depends on the condition of your oven but generally, the self-cleaning of an oven takes about three hours.
How to Clean an Oven Naturally?
If you don’t want to use the self-cleaning feature of your oven for any reason, move to universal and natural household items to clean your oven naturally. Here is the process to clean your oven naturally:
First, put a pan of plain water inside the oven.
Turn it on and heat it to 225 degrees F for up to twenty minutes.
After twenty minutes, let it cool down.
Now, add some soap to the water pan scrub the grime, and muck with a nylon sponge.
Scrub properly until you see a clean and tidy surface of your oven.
Calphalon is a brand everyone has used himself or probably eaten the food cooked in it.
Since it is the widely preferred kitchen cookware, it is likely more vulnerable to diverse good and bad conditions.
Although no person wants to ruin the things they need the most to survive, we are human beings and things happen to us.
Sometimes we are faced by accidents and sometimes our utensils are faced by accidents and we are the culprits, intentionally or unintentionally.
Just a minute of carelessness and the stains get over the surface for good, though for good only if you don’t bother doing anything about it.
Otherwise, it can all be sorted with just a minute of care too.
However, if it is you or anyone else in the home who is guilty of burning the food in Calphalon pan, worry not.
I am about to prove you innocent soon.
6 Easy Ways to Clean Burnt Pans
Products and Procedure
Well, I validate to unfold the solution of the problem straight enough to make it easier for you to explain to any other person afterward.
1- Barkeeper’s friend
Why:
Barkeeper’s Friend is a distinguished cleaning agent available in powder and soft cleanser form, and your utensils will thank you if you use them.
If you happen to visit many kitchens, I am sure, you will find it near the sink in most kitchens.
How:
Rinse the Calphalon pan with lukewarm water.
Sprinkle the Barkeeper’s powder or cleanser on the spot where the scratch, stain, or burnt grease is residing. Gently scrub the burnt area in a small circle with the scrubber for a few minutes. Also, add a bit of dish soap to help lift the stains. Wash it out and dry it with a clean cloth.
* It will cost you under $10.How to Clean Burnt Calphalon Pans
2- Bon Ami
Why:
Bon Ami is another amazing household cleaning agent utilized for various causes in which cleaning utensils is one. It is also availed in powder form just like Barkeeper’s friend.
If you don’t find the Barkeeper’s friend, it is the ideal substitute.
How:
The procedure of cleaning the burnt Calphalon with Bon Ami is the same as with the Barkeepers.
* It will cost you under $15.
3- Magic Eraser
Why:
Magic Eraser (called Melamine foam) sold by Mr. Clean is a hard-core cleaner that gets you rid of any stain out there just by rubbing on the affected part.
How:
Wash or wet the utensil.
Rub the magic eraser on the areas where the stain or burn is in excess.
Keep rubbing gently.
Rinse out the utensil.
* It will cost you under $15.
you might like: 5 Simple Ways to Clean Copper Pans
4- Dawn Foam
Why:
Dawn foam is a potent cleansing formula, claiming to absorb 5 times more grease and dirt than the other cleaners of the same brand.
It is a liquid soap that you can turn into a full leathery foam in an additional foaming dispenser by adding water and this liquid soap in it.
How:
Wet the Calphalon pan.
Pour some foam from the foaming dispenser.Take a scrubber and rub it for some time until the burn layers start removing. Rinse well afterward.
* It will cost you around $20 for a Dawn soap bottle and foaming refill.
5- Calphalon Dortmund
Why:
A specially designed product for Calphalon users (hard-anodized Calphalon pan) that you can even use daily without worrying about the negative consequences.
It not only removes the burns but also retains the surface shine. So it is 2-in-1, cleaner, and polisher.
How:
All you need to do is take a little amount of this cleaner and rub it with the scrubber you have alongside.
Rinse well later.
* Don’t give up if the stains don’t go off immediately instead keep using it regularly. It is effective but takes time in alternate situations.
* It will cost you under $20.
6- Traditional Tips:
Our traditional tips are our asset.
When nothing else works, these work amazingly. Kudos to the one who invented or introduced these homemade recipes for working things out. Here’s how you can make use of any of the following tips to kill the burns of your Calphalon pan cheaply.
i- Baking Soda
Why:
Baking soda or Sodium Bicarbonate is alkali in nature and thus a strong cleaning agent that acts against stubborn stains actively.
However, in most cases. this tip may take a little time to evaluate a positive outcome but it will surely do good on its part.
It is not a chemical as we also eat it through baking but still using it wisely puts your Calphalon on the safe side from further harm.
Plus, being easily available at home you can save your bucks for a good purchase sometime.
How:
Make a thin paste of baking soda plus warm water.
Apply two or three layers of it on the Calphalon pan.
Let it sit for a minimum of 30 minutes and a maximum of 1 hour to see the result. Later, gently wash it off under the tap.
* If the stain is dense, let the cleaning mixture sit for a bit longer and apply another layer from time to time.
ii- White Vinegar
Why:
A lot of kinds of vinegar are available in the market or in your kitchen cabinet too but the one we will need for the process is white vinegar.
It is highly acidic because of the acetic acid and that is what makes it a weapon in killing the burn layers off your Calphalon pan.
How:
Take equal proportions of both white vinegar and water and mix well.
Put this solution in burnt Calphalon and let the low flame work on until it starts boiling.
After one or two boiling waves, turn the flame off and let the solution be there for more than a couple of minutes.
Remove the solution in the sink and scrub the burnt residues gently.
Rinse well.
* You can also replace the vinegar with dishwasher liquid for the same process.
iii- Salt and Lemon
Why:
Both salt and lemon have been used as effective cleansing agents for a century. However, if we bring both in one place, it will double the performance.
Be it stain or grease, this mixture will clear away all.
How:
Take two spoons of salt and one and a half spoonfuls of lemon juice (increase the quantity if it is less for you
Apply the mixture to the area of burnt spots.
Leave it on for no more than a maximum of 30 to 45 minutes.
Scrub with the scrubber without being too hard.
Rinse well.
Tips and Ideas:
You can replace your regular scrubber with a Dobbie Pad as its surface is a plastic net. It is enough to prevent scratches.
Daily rinsing of the Calphalon pan should be done with lukewarm or direct tap water
Avoid high flames- a plain approach to keep it safe in the long run. Thank me later for this tip in particular.
Wrapping Up
All the cleaning methods listed above do not require any hard measurements and are good in all areas except in some.
If your Calphalon pan is aluminum anodized or non-stick, avoid traditional tips.
On the other hand, if your Calphalon pan is stainless steel in nature, you are good to go with all the valid methods.
In the last, I advise you to be patient with whichever method you pick since patience is the key to results.
Ever since I started cooking for my living, as I shifted to another city for a job, I entered into the world of Cookware types.
It jolted my entire being to the core when I learned the number of types and their specialist uses and also the different accurate ways of handling them.
Gradually, it started happening and I became a pro, yes in cooking and cookware.
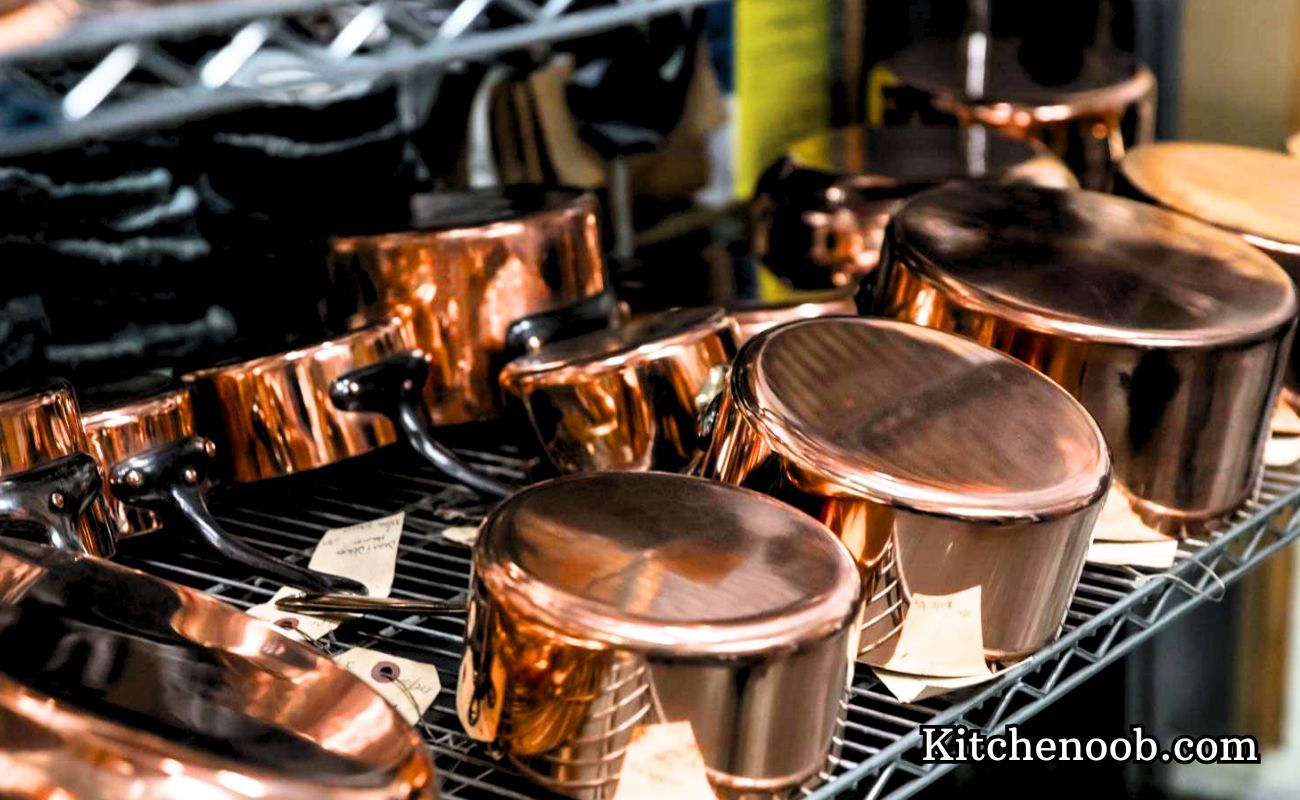
Needless to say, Copper cookware is known for its beauty.
So the appearance is another factor, many people want these pans in their kitchen.
In addition, a big mass loves it for the only reason, it prepares dishes quickly.
Who will want to cook as our ancestors did?
Cooking… cooking… cooking… still on the stove… cooking… a little left.
Nobody has such patience in the 21st century, to be honest, at least I don’t.
Once I cook and leave it for some time for a market visit or other chores, it is still warm and ready to be enjoyed when I come back.
Amidst all, you just need to season it properly and I will tell you how along with many other things that I learned sideways.
Plus, if random cookware research has brought you to this page, it is going to help you ton.
What is Seasoning?
Seasoning involves layering the surface of the pan with oil after the scheduled time for the sake of oxidation delay as well as for lasting life.
Why Seasoning is important?
I tell you, it is important to save your recipes from sticking to the pan surface. In case it sticks, I bet the left-behind food will not be enough to fill your hunger.
Keep the corrosion and unevenness at bay by following the guided steps.
How to Season:
Seasoning is all about caring.
Yes, the ease of copper pan is aided with your efforts of maintenance and you kind of eat your fruit of hard work for the long term.
The steps are so easy and interesting that you will enjoy doing so unless you are not a lazy king or queen.
Process Ingredients:
Oil (1 to 2 tablespoon)
Normal water
Liquid soap
Stovetop
Clean cloth
Step 1:
Start with washing the pan thoroughly. Not just a random rinse, wash it with liquid soap.
Step 2:
Dry it well. Don’t take it straight to the seasoning step after washing. There is another step between washing and oiling called drying. Well, I am mentioning this because people are habitual of being so quick cum clumsy to not let the pan dry before the oil is to be poured.
In this situation, an extra layer of water plus oil forms on the surface and it is difficult to remove or dry.
Step 3:
Take any oil of your choice and spread it evenly on the pan surface.
*I have listed down the good and bad oils and the reasons, have a look.
Repeating for the benefit, do not leave any dry spots.
For smart assistance, use a small and clean piece of cloth to spread on the surface and sides.
Step 4:
Put the Copper pan on the stovetop on medium heat flame until the smoke flames start rising in the air.
Step 5:
Remove the Copper pan from the stovetop and let it sit to dry. Take a clean cloth to dab the surface gently just to absorb the extra oil. Done!
Good oils to be used:
Grape-seed oil: It is a great oil for seasoning because of its smoke production. It does not smell too heavy either and hence it is easily available.
Vegetable oil: It is a great hit for non-stick surfaces and let’s not ignore the bonus of availability, every time in the kitchen.
Almond oil: This is filled with many health benefits and is light to absorb easily. The smoke production is also on-point.
The other amazing ”good oils” for seasoning purposes include avocado oil, canola oil, coconut oil(refined form), corn oil(refined form), clarified butter, and mustard oil.
Bad oils to be avoided:
Flaxseed oil: While many suggest it, I don’t recommend it at all. This is because it has an odd smell and has even low smoke production. You will not like buying it as it is heavy on the pocket, and heavy on the nostrils too.
Olive oil: Lowest smoke production which is a drawback of seasoning. Isn’t it?
Safflower oil: In the unrefined form, it has a very low smoke point which makes it unacceptable for seasoning.
Other some of the ”bad oils” for seasoning include castor oil, coconut oil(unrefined form), corn oil(unrefined form), hemp oil, soybean oil, and walnut oil(unrefined form).
Kitchen Habits to Adopt:
For Copper pans, always employ plastic and wooden spatulas to cook. The other ones, metal or steel, is quite harmful to the copper surface.
Make a schedule of seasoning the pan once in two months.
Once you wash it after use, dry it with a clean cloth right there. Don’t leave it to dry itself.
Don’t leave it open either. Put it in the cabinet or somewhere else carefully. Though copper is antibacterial, it still deserves its place. Give it respect, it makes you yummy food.
Say no to high heat. It is for your better. I know it can endure but remember it heats up promptly so no need to superheat it.
As suggested by experts, keep the ingredients ready and decorated on the counter before you place the pan on the stovetop. There is a logic, as we know, copper cookware heats soon, it will not spare you any time to run here and there to grab spices and cut the vegetables. No, you get to stand there and just add the ingredients.
Avoid induction stove and electric heat on usual. If needed most, you can go for electric heating otherwise gas stove is best regularly.
Once in a while vinegar cleaning also does wonders for the copper surface.
When it is brand new, rinse it with warm water and liquid soap before putting it to cook anything.
Wrapping Up
Copper, being a good heat conductor, put forward a handful of perks in even heat distribution, lightweight, sturdy build-up, and quick preparation. Anyhow, to be worthy of all these pros, something to return is necessary.
According to a credible estimation on account of modern research, 50 to 60 % of people know the precise recipe method.
But on the same page, they are clueless about the authentic way of using particular cookware types.
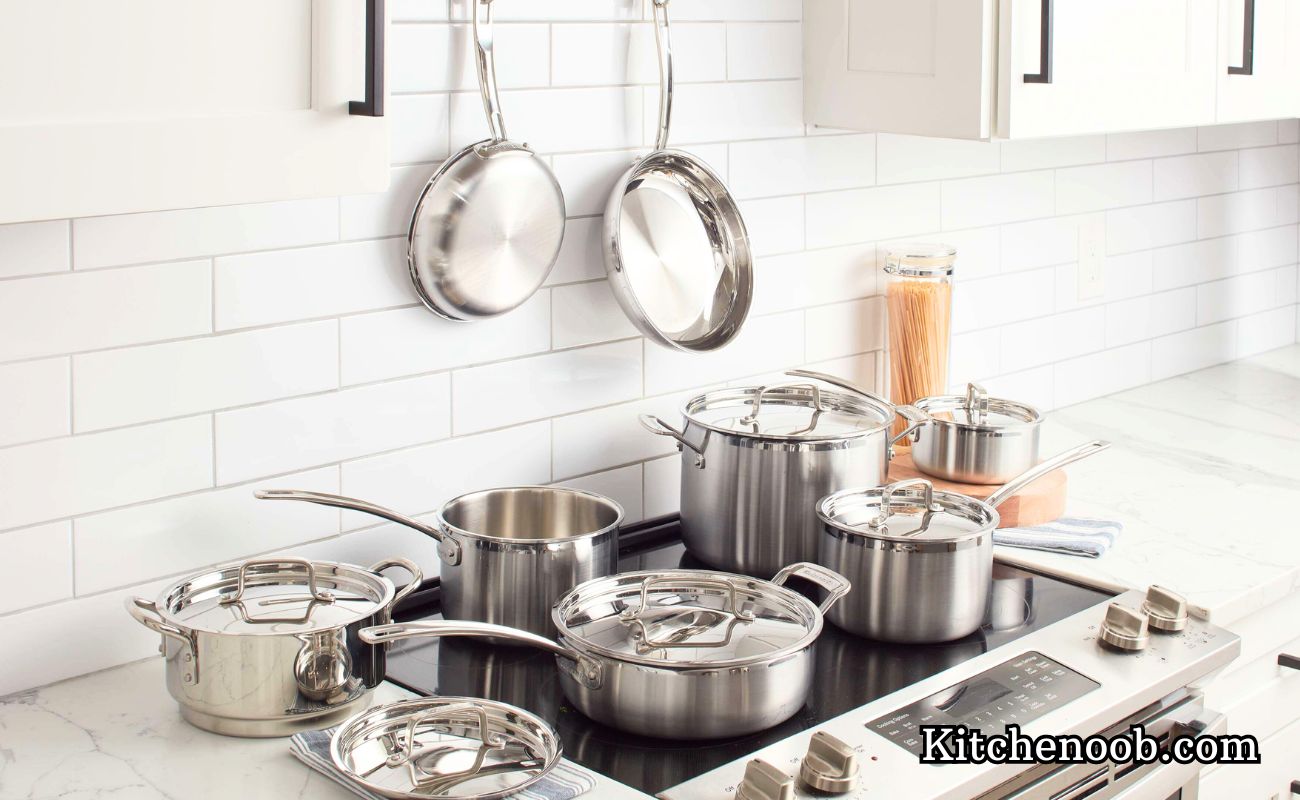
Sadly, the Stainless steel pans and pots are one of those who get to face this ignorant cruelty that gradually ruins their future performance.
My mom used Stainless steel and she used to mention to me how even her mother used stainless steel.
Before this, I was happily using a mix of half of the non-stick and the other half of the ceramic cookware in my kitchen.
Then one day I was nostalgic and thought to carry on this mother’s heritage of using stainless steel.
I ran to buy it, a bundle of stainless steel cookware from a famous brand to last its eternity.
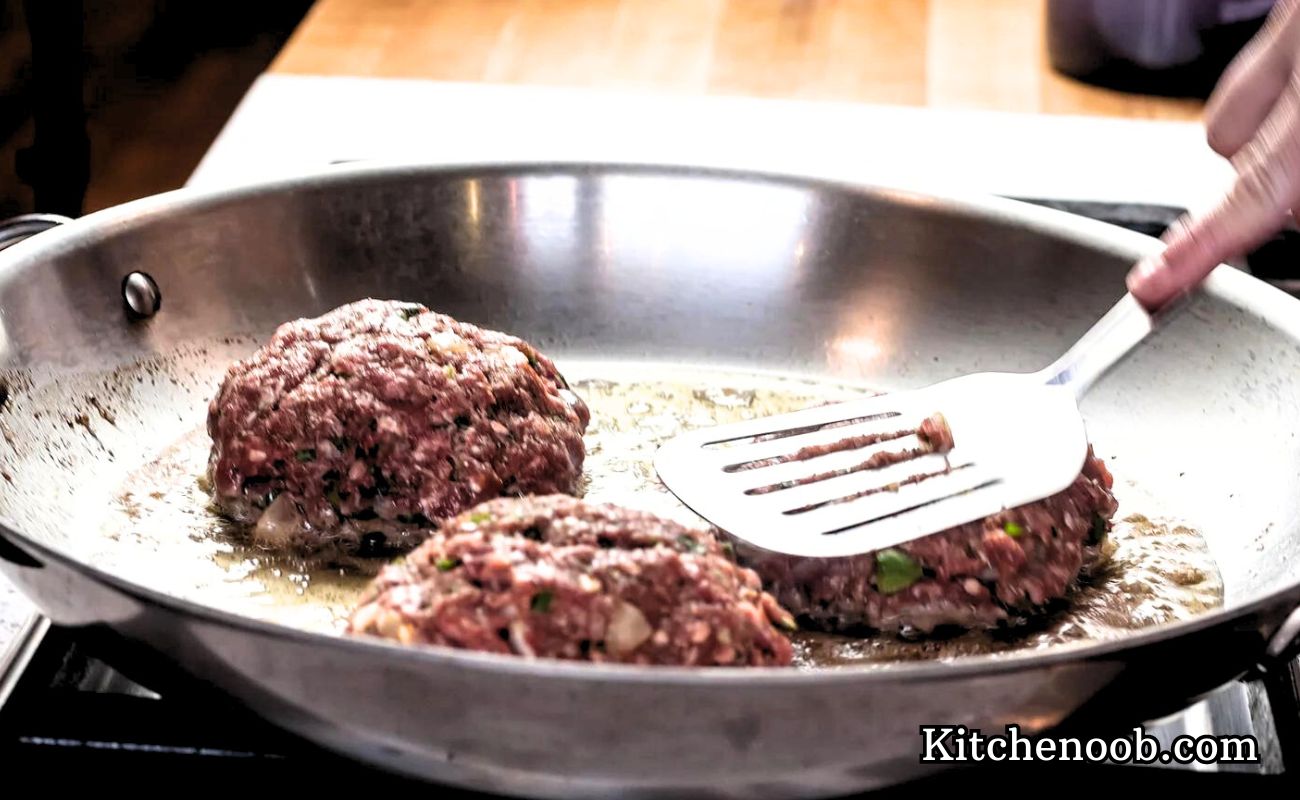
I can tell my kitchen adventure of how terrible in taste was the introductory lunch cooked in the stainless steel pot the day I bought it.
Because I did not preheat it decently and rushed to put in the ingredients.
Therefore, half of the meal stuck to the pan and I could not mix suitably due to the frustration of messing up the dish as well as my mood. How clumsy of me back then!
Anyway, bad experiences honestly teach you to teach others to stave off further bad experiences.
Time made me receptive to many rights and wrongs that we usually skip to make an impression of in our daily cooking routine.
Guess what, I am here to share the whole lesson with you people that I learned piecemeal.
As it is one’s moral duty to be caring for each other. I know I am a good human being. Whoops.
A Stepwise Guide: The Dos and Don’ts While Using Stainless Steel
1- Say ”No” to High Temperature
The main rule to cook in stainless steel is to execute low temperatures.
Why is it so?
Stainless steel cookware is constructed by layering up a deal of many harmful elements that impose a straight effect on our health if taken inside, God forbid.
To intercept this process, there is a shielding layer that ushers to the final surface we use for the cooking.
However, there is a constant risk of its leaching.
If the safe surface gets leached, we may meet the damaging elements in our food, and needless to say, the very situation is quite alarming.
To overcome this possibility, it is advised to promote lower temperatures on stainless steel.
2- Say ” Yes” to Preheating
The second rule to cooking in stainless steel is to preheat the utensil before you begin with the expansion of oil.
Why is it so?
Stainless steel is a kind of metal that has two distinct surface shapes at hot and cold temperatures.
When it is cold or at room temperature, some pores show up, and very obvious a normal naked human eye can not observe it.
This is pretty much possible with the help of a microscope if you are gravely curious.
Anyhow, these edgy and slightly deep pores invite the ingredients into the invisible surface pits with the idea for food to stick.
In this case, the cooking will not remain simple and smooth anymore.
Notwithstanding, when the exterior is hot or heated, the pores spontaneously fill up with warmth and it gets level.
This readiness of the surface to cooking leaves less to no chance of sticking.
In light of this reason, the fair suggestion is to preheat first and then move on to the next step.
How to Know if it is Suitably Preheated?
Some people often get distracted by preheating.
They assume it is done when it actually is not and the other way round.
To test this, add a drop of water to the pan while it is still on the burner.
If the water absorbs on the surface, you require additional time to keep on heating.
However, if the water drop remains still and does not soak up, you are good to go on next.
The standard 2 to 3 minutes are sufficient for preheating at low-medium temperature.
The duration may also exceed up 4 or 5 minutes if the temperature is extra low.
3- Say ”Yes” to Oiling the Pan
The third step plus rule is oiling the pan following the preheating.
Why is it so?
The pan is greased with oil to make the final arrangement for cooking.
You will be just adding the ingredients right after oiling and stirring them up to proceed with the recipe.
Whatever you cook, there is always some or a little oil required for the perfect searing.
The chief idea of oiling is to oil it at the right hot temperature, at the freshly preheated surface.
After all, the addition of oil has no purpose or impact on the pan when it is cold.
The oil will ultimately fade in the pores and the after heating will merely draw the mess.
After accomplishing a flat surface, the oil is to be even across all around.
You can also do this through a brush or tissue paper.
Keep the complete list of ingredients ready near you so you don’t have to run around in search of them.
Otherwise, the pan may overheat and burn the dish right away.
You can also season your stainless steel pan the exact way you do the cast-iron pan. The aftermath finish feels like a non-stick coating for smooth tossing and stirring with amazing taste.
Well, this is another treatment to discourage the dishes from gripping the surface.
You can learn a detailed difference between best and not-so-best oils for seasoning, here.
4- Say ”Yes” to Proper Cleaning
The explicit cleaning, in simple words, increases the durability of your product.
Here are a few pointers that you can augment in your daily cleaning session.
Let your pan or pot cool down thoroughly before you put it under the tap splashing cold water.
Make use of a wool sponge or other soft scrubber to rub the pan, be gentle doing so. Avoid steel scrubbers on any kind of stainless steel cookware.
To improve the universal sparkle and get rid of stubborn stains, use powerful market cleaning agents such as Barkeeper’s Friend, Bon Ami, or Dawn Foam.
If substantial food remnants last in the pan after cooking, add a cup of water in it and leave to boil. The hot water will mellow out the residues which will then get off easily.
Occasionally, clean the pan with vinegar or baking soda to alleviate the stains, smell, and scratches.
Why Non-stick Should be Ignored For Regular Use?
Well, I got to comprehend this fact much later. Kudos to my intellect.
While digging out for stainless steel, I was acquainted with a viral debate on the internet that how non-stick should be resisted for regular use.
Because the authorities are constantly communicating false information to the customers about the small quantity of Teflon used in the making.
Don’t fear, once in a while or thrice a week is still acceptable.
But cooking three times a day for daily purposes in non-stick cookware can lead you to many troubles.
Regardless of how frequently the companies advertise for their safe and healthy application.
You should expand your wit in the 21st century, for God’s sake.
Why one Must have a Stainless Steel pan and Pot?
I have admired my mother’s cooking a lot for a considerable part of my life.
The exceptional color, taste, and texture would also compel me to cook like her though I was not so fond of it.
Well, the stainless steel cookware also had its share in those fine cuisines that I cannot help but recall time and again.
No matter how serious are you about your modern pick of non-stick in specific or any other type, the durability one tends to find in stainless steel is just not anywhere else.
In addition, several recipes do justice to your taste buds only when you cook in stainless steel.
Wrapping Up
Stainless steel in the original quality is found expensive but it can dearly replace your affection for non-stick.
Taking the guided stand for either your newly bought or a couple of years old stainless steel cookware will be returned to you in the shape of more power and performance.
Cast iron skillet is perfect cooking equipment, and its popularity is matchless. The major benefits of cast iron cookware are:
They are affordable, lasts for decades, sears steak flawlessly, and when you use it frequently can boost iron consumption. Do you know any other skillet that is so beneficial? We don’t think so.
There is a misconception among the users that cast iron skillets are challenging to clean or maintain. We know that you cannot throw these in the dishwasher like any other, but cleaning the cast iron skillet is not difficult, and if you know how to clean it, you will never think about switching from it. We promise.
How to Clean a Cast Iron Skillet
Cleaning cast iron cookware is simple. Here’s how you can do it:
After cooking in your cast iron skillet, rinse the pan under the hot water. Then take a scrub brush so that no residue is left on the pan’s surface. Now, dry the skillet by using a kitchen towel. Ensure that the skillet is dried entirely. You can also place it on a stove on low flames for a couple of minutes.
Now, apply a thin coat of oil on the inner side of a skillet. This oil coating will protect the pan’s surface from rust. If your cast iron skillet has a lid, it should not be covered, or you can place a paper towel between the skillet and the lid for better air circulation.
This process will prevent moisture from building up in the skillet, and it will also keep the skillet safe from corrosion.
Similarly, don’t store food in a cast-iron skillet as the food acids can harm the surface of your skillet. And keep in mind that cast iron cookware is not dishwasher safe.
Here are a few more cast iron maintenance tips and facts:
Cast iron skillet boosts the iron intake in your diet; the food that you prepare in a cast iron skillet absorbs a bit of iron.
Never pour cold liquid into the skillet because this temperature change might cause a crack in the pan.
Don’t soak your skillet in the water.
A little determination and time spent on the maintenance of your skillet will turn it in a long-lasting piece of cookware that will offer excellent to you and perhaps your grandchildren.
It’s not that time-consuming or tricky to maintain or wash the cast iron skillet. So, if you are not using one, it’s time to get the one.
How to Clean a Rusty Cast Iron Skillet
If you have a rusty, filthy skillet, it’s time to think about the restoration process. Depending on the condition of your skillet, you have many ways to treat the skillet.
First, you will have to prepare a solution. Take vinegar and water in equal quantities as per the size of your skillet. Now soak the skillet in this mixture.
It will remove all the rust from the pan’s surface. You can take a large container that can accommodate the skillet and put it in that container with the solution. Keep the skillet in the solution for one to four hours, as per the condition of your skillet. The acidic particles in the vinegar will remove the corrosion. You can also use the scrub brush to get rid of the rust.
Please don’t leave the skillet for too long in the solution because it might affect your skillet’s surface. Keep the condition of your pan in mind before placing it in the solution.
If your cast iron skillet has more rust, you must soak it in the solution for a long time.
And when you see no rust on the skillet, wear the gloves and take out the skillet from the solution. After taking it out, wash it in plain running water. After this, dry out the skillet entirely with a towel, or place it on a stove on low flame for a couple of minutes. You can also place the skillet in the oven to ensure it is completely dried.
Now Oil Up the skillet
It’s the characteristic of cast iron cookware to form a thin layer of rust on the surface of the skillet immediately after it dries off. To prevent this, take fine sandpaper to get rid of that thin layer of rust and scrub it to remove the rust and other particles. Now, apply a thin layer of oil on the surface of the pan so the rust cannot come back.
Now your cast iron skillet is free from dirt and rust; you can season it for better working and long-lasting usage. Don’t cook in the skillet without seasoning it.
Best Cast Iron Cleaners
The Ringer – The Handy Tool Designed To Clean Cast Iron Cookware
This affordable steel cast iron cleaner measures around 8×6-inches. The cleaner features a mesh sheet that is entirely rustproof and also features stainless steel chainmail.
The cleaner is quite efficient, and it can effectively remove almost all types of grime and dirt from your skillet. It helps to remove caked-on gravel to burnt cheese and crust without much effort. The working mechanism of the cleaner is simple, and you will not notice any stripping of the seasoning nor it will leave any marks or scratches on the surface of the pan.
Apart from washing your cast iron cookware, you can also use it to clean glassware, stainless steel cookware, and even more.Lastly, it features a little loop so you can hang it after using it, and it is dishwasher safe.
Full Circle Tenacious Cast Iron Brush and Scraper Tool
Our next in this category are made from renewable or recycled materials. This Full Circle Tenacious Cast Iron Brush and Scraper features a sturdy bamboo handle with stiff nylon bristles. The bristles of this scraper are made from recycled plastic materials.
The brush or scraper works great and looks good too. The overall build is durable, and the bamboo handle can survive rugged usage. So, there will be no issues regarding the breaking of the handle or anything similar even if you give it harsh treatment.
The dark grey colored bristles are effective even if you use them on various materials, including cast iron cookware. It is a much better choice than a standard scrubbing brush and will not look gross even after several weeks.
Cast Iron Cleaner and Care Kit
Cast Iron Cookware tends to last for many decades. Their lives are also much longer than ours, but it is only possible if you use and maintain them properly. This Cast Iron Cleaner and Care Kit by Airpod Skins allows you to take care of your cast iron skillets and other cookware properly. Each item in this cleaning kit will prolong the life of your cookware.
Overall, every item in the kit features premium quality materials such as food-grade, premium silicone, natural oil, and heavy-duty plastic. So, you will not notice any rust, chipping, or other deformation on your cookware.
Another prominent feature of this kit is that all the items are dishwasher-safe. So, no problem in cleaning and maintaining the included items. You can use this kit for other materials besides cast iron such as stainless steel, glassware, cookie sheet, pie pans, and even more.